This Is Why Everyone’s Obsessed with Pork Belly Burnt Ends
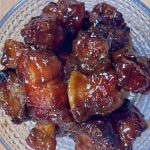
We first had pork belly burnt ends standing in line at Franklin Barbecue in Austin, sun already high, coffee (and beers!) in hand, fully committed to the wait because everyone said it was worth it. It was. Sticky, smoky, caramelized bites that stopped conversation mid-sentence. We came home thinking, “we need a version of this we can pull off any time.” You may have heard of burnt ends before, from brisket. These pork belly burnt ends are next level!
This is that version. No smoker required (but you certainly can use your smoker!) No stress. Just good cooking and a bit of patience, and the kind of result that has people hovering around the tray, going back for one more until they’re gone.
If you want to kick off BBQ season with something that feels a little impressive without turning your whole day into a project, this is it. Pork belly burnt ends are sticky, caramelized, and just rich enough to feel like a treat.
Why This Pork Belly Recipe Works
Pork belly does most of the work for you. It’s naturally rich, so when you cook it low and slow, the fat renders and keeps everything tender. Then you hit it with sauce and honey and send it back in until it tightens up and gets that deep, sticky finish. Two simple stages. Big payoff.
Where do I find Pork Belly?
Ask your neighbourhood butcher shop (such as Fore Quarter Butcher Shop) for a piece of really fresh pork belly, skin off. Well stocked supermarkets, especially Asian supermarkets carry pork belly too. Fresh is key.
- Prep Time: 10 Minutes
- Cook Time: 2 hours
- Total Time: 2 hours 10 minutes
- Yield: 6-8 Servings Appetizer Servings 1x
Ingredients
- 2-2.25 lb fresh, skinless pork belly
- 1/3 cup BBQ spice rub
- 3/4 cup BBQ sauce (we love Lancaster Smokehouse Sweet BBQ Sauce)
- 1/4 cup honey
Instructions
- Start by cutting your pork belly into strips, then into 1-inch cubes. Try to keep them fairly even so they cook at the same rate. Season generously with your BBQ rub, making sure every side is coated. Let it sit for 10–15 minutes so the seasoning has a chance to settle in.
- Place the pork belly pieces on a rack set over a baking sheet. This step matters. It keeps the pork from sitting in its fat and helps everything cook evenly. Cook at 275°F in your oven, grill, or smoker with the pieces fat side up. After about an hour, check in. If you want to add a bit more depth, give them a quick spritz with cider vinegar, but it’s optional.
- Keep cooking until a skewer slides in easily and pulls out without resistance. That’s your cue that they’re tender and ready for the next step. Plan for about 1½ hours here, but trust the skewer over the clock—if it doesn’t slide in easily, it’s not ready yet.
- Transfer the pork to a bowl and toss with the BBQ sauce and honey until everything is coated. You don’t need to drown them, just enough to coat and cling.
- Return the pork belly back onto the rack and into the oven at 275°F, uncovered, for another 30–45 minutes. This is where everything comes together. The sauce thickens, the edges caramelize, and the pieces turn into sticky, golden bites.
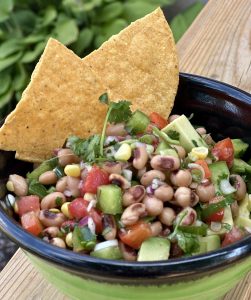
- Keep reading for sauce & side serving suggestions!
Notes

Find it online: https://blog.theculinarystudio.ca/recipes/pork-belly-burnt-ends/