
This post contains affiliate links

Let’s talk about eating chilaquiles: a guitarist played nearby, with iguanas walking through the trees, in what Jody calls a magical, mystical place. This was our intro to real chilaquiles, at a small town Mexican brunch joint. If you’ve never made chilaquiles, prepare to wonder where this dish has been your whole life.
This is one of those recipes that feels celebratory but is rooted in practicality. Traditionally a way to use up day-old tortillas, chilaquiles turn humble ingredients into something bold, comforting, and really delicious.
It’s brunch. It’s hangover cure. It’s weeknight dinner. It’s “clean out the fridge but make it impressive.”
And once you understand the technique, you’ll never look at leftover tortillas the same way again.
What’s great about this recipe is that it is many recipe in one. You’ll learn how to make a chili sauce from scratch, a slight variation from our Basic Chili Sauce, how to fry corn tortillas and how to have fun with garnishes.
What Are Chilaquiles?
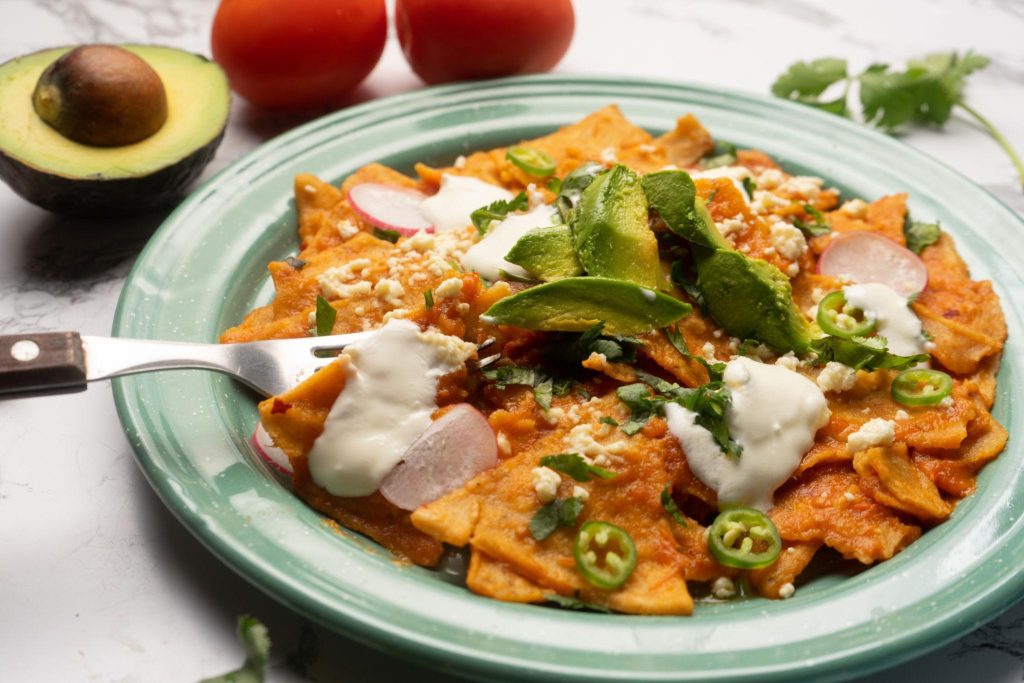
Chilaquiles (pronounced chee-lah-KEE-les) are a classic Mexican dish where crispy corn tortillas are simmered briefly in salsa — usually red (rojos) or green (verdes) — then topped with cheese, crema, herbs, and often eggs.
The magic lies in contrast:
-
Crispy edges + saucy centers
-
Smoky heat + fresh garnishes
-
Rich yolk + bright herbs
It’s layered, textured, and actually comfort food!
Why This Chilaquiles Recipe Works
This version is built around a homemade salsa roja using dried guajillo and ancho chilies.
Guajillo chilies bring brightness and gentle heat.
Ancho chilies add depth and a subtle raisin-like richness.
What’s fantastic is that these dried chiles are becoming more readily available. We always get them at our local America Latina Grocery store, but we recently have seen them in the produce section at Sobeys!
Blended with tomatoes, garlic, cumin, and oregano, the result is a sauce that’s complex without being complicated.
And yes — you can absolutely make components ahead.
- Prep Time: 20 minutes
- Cook Time: 30 minutes Total
- Total Time: 45 Minutes
- Yield: 4 servings 1x
Ingredients
For the Salsa Roja
- 4–5 dried guajillo chilies
- 1–2 dried ancho chilies
- 1 cup (250 ml) canned whole tomatoes with juices
- 2 cloves garlic
- 1/4 white onion
- 1/2 tsp (2 ml) dried cumin
- 1/2 tsp (2 ml) dried oregano
- Salt, to taste
- 3 tbsp (45 ml) oil
- 2 cups (500 ml) water
For the Tortillas & Assembly
- 12 corn tortillas
- Oil for frying (enough for 1/2 inch depth)
- Salt, to taste
- 150–200 g queso fresco
- 1 ripe avocado, sliced
- 1/4 bunch cilantro, chopped
- 1/2 cup (125 ml) crema or sour cream
- 4 green onions, sliced
- 2 radishes, thinly sliced
- Fried eggs, as needed
Instructions
- Preheat oven to 350 F.
- Seed & stem chilies.
- Toast chilies in a frying pan over medium heat, moving frequently until blistered but not burnt. Place in a heatproof bowl, cover with HOT water and let stand until softened. Add to a blender along with tomatoes, garlic, onion, spices and a good pinch of salt. Blend until smooth.
- Warm oil up in a pot or frying pan, then carefully pour in salsa. Add about 1 cup of water to your blender to clean it out, and add that to the pot as well. Add another cup of water, bring to a boil and let simmer for about 20 minutes. Taste and adjust salt. The sauce should coat the back of a spoon.
- Fry tortillas: add enough oil to rise about ½ inch in a large, wide, frying pan and slowly warm over medium heat.
- Cut tortillas into triangles. Add to oil in batches, careful not to overcrowd the pan. Fry until crisp, about one minute per side. Remove with a slotted spoon to a paper towel lined plate. Sprinkle with salt.
- Slice & dice garnishes (green onion, radish, cilantro, avocado)
- Wipe out excess oil from the pan (if it is oven proof), or use a baking dish for this next step: Pour in salsa roja, add in tortillas (you may not need all of them) and toss to coat.
- Sprinkle with queso fresco place in oven for 10-15 minutes. This will allow the sauce & the tortillas to come together!
- Meanwhile, fry eggs or poach as you like, but a runny yolk is highly recommended.
- To Serve: Use a large spoon or spatula to pile chilaquiles on your plate. Top with your eggs and all your favourite garnishes.
Notes
Chilaquiles Make-Ahead Strategy
All components can be made ahead — just keep them separate.
-
Salsa roja can be made up to 3 days in advance.
-
Tortilla chips can be made the day before (or use high-quality store-bought).
William Natter14:37 30 Apr 25We have taken many classes over several years, and they never disappoint! Kristie & team always have great pointers and tricks to learn in the video. We love the Japanese burgers, and they are always a hit with guests. That's the thing: you make the recipe at home, it doesn't take a long time, and the result is so good that you want to make it again and again. Just try one, you'll see. 🙂James Blashill12:54 29 Apr 25I had such a fantastic experience at the cooking class! My daughter and I had an amazing time — our Bao Buns and Crispy Chicken turned out delicious, and we learned so much throughout the session. It was a fun, inspiring, and rewarding evening. I can’t wait to come back for another class. Highly recommend!ABM Janzen12:00 26 Apr 25Our virtual cooking class experience was top notch! Well organized, wonderfully communicated, and entertaining! A delicious outcome which boosted our confidence to try more challenging recipes in the future. Highly recommend!lori letts16:52 22 Apr 25I have taken a few classes in the past - always find the products delicious, and I enjoy the challenge of trying to keep up 🙂
I subscribe the updates and get links to recipes - I recently made the Olive Oil Lemon cake. It turned out delicious – as you said in the description, very moist! My daughter has a birthday in strawberry season and typically she asks for strawberry shortcake with a traditional shortcake recipe… I served the lemon came this weekend with a bit of whipping cream and fresh strawberries (your picture was quite enticing) and her comment was that her birthday request this year would be to replace the traditional shortcake with this recipe!Kat Garrod15:06 12 Apr 25I've taken several on-line cooking classes from The Culinary Studio and have really enjoyed each one. The recipes are delicious and the instructions are very well laid out. I always learn new cooking tips and skills.Cyn Vavasour17:52 07 Apr 25It has been most likely a year and a half since I’ve made moussaka. Having the recording available was a godsend. So good and lots of leftovers! Having the recording is priceless!
I made Dan Dan noodles last month and again referred to the recording as it has been awhile. I was grateful for the reminders, tips and tricks. Not to mention, I love to cook with Kirstie and Jody. They make it so much fun!
Most of the meals I make are from your repertoire. I think I have close to 60!Donna Turner20:41 06 Mar 25Love these ladies! Classes are easy to follow, informative, filled with all kinds of tricks & tips and best of all DELICIOUS!! This is our "night out" dining adventure that we can re-do & show off to our family & friends.Linda Brodrecht01:22 17 Feb 25My husband and I joined the Valentine's Day Date Night cooking class. Very enjoyable experience full of informative tips and thorough explanations followed by a delectable meal. Thank you Kirstie & Jodie. We'll be back!Jeff Eitel00:48 31 Jan 25Lots of fun and food turned out great.John H21:46 30 Jan 25I recently did an online Lamb Briyani class. It used some cooking techniques I wasn't familiar with and produced a dish that was as tasty as the best Indian food I've ever had the pleasure of enjoying.R S23:12 27 Jan 25I have done a few classes with the Culinary Studio and always enjoy the classes and the fabulous meals. They deliver the food to my door all prepped for the class if I like (which I do!). Highly recommended.Bruce White01:16 24 Jan 25We did a virtual zoom cooking class. It was better than cooking classes we have done in a actual class. We really enjoyed our ourselves. We have made the meal a couple of times since the class. We have friends over for the session and have great restaurant quality mealsIain Peck00:46 25 Nov 24The Culinary Studio is an wonderful online chef duo!
You will learn delicious recipes taught in real time from start to end by two good friends who want nothing more than to teach you how to cook and and have fun doing it. Class presentation is practical and encouraging with one chef starting and one playing 'catch up' so you do not miss anything and no question will go unanswered!
The recipe with food pack is perfectly packaged and always arrives on time to make it easy so you do not have to shop!
Several recipes from the Culinary Studio are in our regular rotation!
Excited to keep cooking with you Kirstie and Jody!Liana Kinzie03:10 20 Nov 24Online classes have allowed me the convenience to open my computer and learn in the comfort of my home and to do the class on my own schedule rather than missing out due to life's interruptions. Classes are paced well and the chef's are ready to answer your cooking questions even if they are unrelated to the class. I have used the recipes frequently in my day to day life and recently at an event where I overhead participants raving about the soup and cookies I had prepared, which were from Culinary Studio class recipes.
I was at the Studio for the very first class they held and I have continued to take classes for the past 13 years. While some things have changed over the years, the quality, knowledge and skills Jody and Kirstie bring to each class has not.The skills I learned through the their instruction have been used daily.B Ellert02:13 20 Nov 24To Chefs Kirstie & Jody! My family and I have thoroughly enjoyed the recipes and techniques we have acquired by following your live sessions and on-demand courses available on your website. You have a casual and an informative style that is very appealing. Most importantly both of you thrive on good food and beverage as much as we do! Bravo - we hope your future includes many more years of teaching and developing new dishes. Thank you. 🙂 -
Garnishes can be prepped ahead.


When ready to serve:
Reheat sauce → toss with chips → fry eggs → assemble.
This makes chilaquiles a fantastic brunch option when hosting.
Why Chilaquiles Belong in Your Rotation
-
Budget-friendly
-
Uses pantry staples
-
Great for leftovers
-
Customizable
- Vegetarian
You can also add:
-
Shredded chicken
-
Black beans
-
Pickled onions
-
Jalapeños
-
Cotija instead of queso fresco
It’s endlessly adaptable.
Final Thoughts
Chilaquiles are proof that simple food can be deeply satisfying.
With just tortillas, chilies, and eggs, you get a dish layered with texture, spice, and richness.
It’s rustic but refined. Comforting yet bold. And once you master the salsa roja, you’ll start finding excuses to make it again and again.
Brunch just leveled up!


