This post contains affiliate links
TL;DR: Our basil pesto recipe combines fresh basil, toasted pumpkin seeds, Parmesan, garlic and good extra virgin olive oil for a bright, versatile sauce you can make in minutes. We use pumpkin seeds instead of traditional pine nuts because they’re affordable, easy to find and give pesto a delicious nutty richness without overpowering the basil.
Why Make Pesto at Home?
Store-bought pesto can’t compete with the fresh, vibrant flavours of homemade basil pesto. When you make it yourself, you control the quality of ingredients, adjust flavours to your liking, and avoid unnecessary preservatives. Plus, it’s one of the easiest ways to elevate pasta, sandwiches, grilled meats, and even roasted or grilled vegetables.
There are a few recipes we think every home cook should have in their back pocket, and a really good basil pesto is one of them. If you’ve got fresh basil, Parmesan, olive oil and a handful of pumpkin seeds, you’re about 10 minutes away from a sauce that can rescue dinner.
Traditional Pesto alla Genovese is made with basil, pine nuts, garlic, cheese and olive oil, traditionally worked together with a mortar and pestle. We love and respect the classic, but in our kitchen we’ve made one very practical switch: pumpkin seeds instead of pine nuts.
Why? They’re delicious, nutritious, considerably easier on the grocery bill, readily available, and they give pesto the richness and body we’re looking for. We also like that pumpkin seeds make this pesto useful for households that need to avoid tree nuts, although you should always check individual ingredient labels if you’re cooking for someone with an allergy.
This is the pesto we toss with hot pasta, spoon onto grilled chicken or fish, spread onto sandwiches and stash in the freezer when the basil is coming faster than we can use it.
How Do You Make the Best Basil Pesto?
Great basil pesto comes down to fresh basil, properly toasted seeds, good Parmesan, quality olive oil and not over-processing everything into a completely smooth paste. Pesto should still have some texture and taste distinctly of basil.
Pesto is simple, which means there’s nowhere for mediocre ingredients or bad technique to hide. Start with fresh, vibrant basil and use an extra virgin olive oil you genuinely like the taste of. Freshly grated Parmesan or Grana Padano will give you much better flavour and texture than pre-grated cheese (which has additives inhibiting it’s blending qualities).
Then pay attention to how you process it. A food processor makes pesto incredibly easy, but more blending isn’t necessarily better. We’re looking for a sauce with some texture, not a green smoothie.
The classic Italian pesto, Pesto alla Genovese, is traditionally made using a mortar and pestle, which helps to release the natural oils from the basil, enhancing its aroma and flavor. While a food processor is a convenient alternative, if you have the time, using a mortar and pestle will give you the richest, most well-rounded pesto.
- Prep Time: 10 Minutes
- Cook Time: 5 Minutes
- Total Time: 15 Minutes
- Yield: 2 cups 1x
Ingredients
This easy basil pesto takes about 10 minutes and makes roughly 1 cup. Toasting the pumpkin seeds before blending gives them a deeper, nuttier flavour and makes this simple sauce taste much more complex.
- 2 cups tightly packed fresh basil leaves
- 1/4 cup shelled pumpkin seeds, also called pepitas
- 1 clove garlic
- 1/2 cup finely grated Parmesan or Grana Padano
- 1/2 cup extra virgin olive oil, plus more as needed
- 1/2 teaspoon sea salt, or to taste
- 1 teaspoon fresh lemon juice, optional
Instructions
For quick homemade pesto, lightly toast the pumpkin seeds, pulse them with the basil and garlic, then add the cheese and olive oil. The whole thing comes together in minutes.
- Toast the pumpkin seeds. Add the pumpkin seeds to a dry skillet over medium heat and cook for a few minutes, stirring frequently, until fragrant and beginning to pop. Transfer them to a plate and let them cool.
- Start the pesto. Add the cooled pumpkin seeds, garlic and basil to a food processor. Pulse several times until everything is finely chopped, stopping to scrape down the sides as needed.
- Add the cheese. Add the Parmesan or Grana Padano and salt, then pulse briefly to combine.
- Add the olive oil. With the food processor running on low, gradually add the olive oil until the pesto reaches your preferred consistency. Don’t keep processing once it’s there.
- Taste and adjust. Taste before adding anything else. Adjust the salt and add the lemon juice if the pesto needs a little brightness.
- Use or store. Use immediately or transfer the pesto to a covered container and refrigerate until needed.
Jody & Kirstie’s Hot Tip: To keep the pesto from darkening at the top, cover with a thin layer of olive oil.
Notes
Should You Make Pesto in a Mortar and Pestle or Food Processor?
A mortar and pestle gives you exceptional control and a beautiful texture, while a food processor is faster and considerably more practical for everyday pesto. We use both, but there’s absolutely nothing wrong with reaching for the food processor.
The traditional mortar-and-pestle technique crushes the basil rather than chopping it with blades. Crushing ruptures the plant cells and releases the basil’s aromatic compounds while allowing you to control the texture gradually. You also avoid generating as much heat as a food processor can when it runs for too long.
But we’re also chefs who live in the real world. If using a food processor means you’re making homemade pesto on a Tuesday night, use the food processor.
The trick is to pulse rather than pulverize. Short bursts give you control, reduce heat buildup and help preserve some texture.
Why Can Pesto Turn Bitter in a Food Processor?
Pesto can taste bitter when ingredients are over-processed, particularly strongly flavoured extra virgin olive oil. Using short pulses and adding the oil toward the end gives you more control.
Extra virgin olive oil naturally contains bitter and peppery compounds. That’s usually a good thing and part of what makes quality olive oil interesting, but aggressive blending can make those characteristics more noticeable.
The basil itself can also suffer when you process it excessively. Fast-moving blades generate heat and expose more of the leaves to oxygen, neither of which helps that fresh basil flavour.
Our solution is simple. Do most of the chopping before adding the oil, then blend only as much as necessary once the olive oil goes in.
How Do You Keep Basil Pesto Green?
Work quickly, avoid overheating the basil and limit its exposure to air if you want pesto to stay vibrant. A little lemon juice can also help, although we use it primarily for flavour rather than relying on it as a colour fix.
Once you bruise or chop basil leaves, enzymes inside the plant come into contact with oxygen and browning begins. It’s similar to what happens when you cut an apple, although the chemistry isn’t exactly the same.
Heat can speed up deterioration too, which gives us another reason not to leave the food processor running unnecessarily.
If you’re storing pesto, press a piece of reusable food wrap directly against the surface or cover it with a thin layer of olive oil before sealing the container. Reducing contact with oxygen helps slow down discolouration.
And don’t panic if your homemade pesto darkens slightly. Bright green is beautiful, but flavour matters more than Instagram.
Why Freshly Grated Parmesan Makes Better Pesto
Freshly grated Parmesan or Grana Padano melts into pesto more evenly and gives you a cleaner, richer flavour than many pre-grated cheeses. It also lets you control the texture of the finished sauce.


I subscribe the updates and get links to recipes - I recently made the Olive Oil Lemon cake. It turned out delicious – as you said in the description, very moist! My daughter has a birthday in strawberry season and typically she asks for strawberry shortcake with a traditional shortcake recipe… I served the lemon came this weekend with a bit of whipping cream and fresh strawberries (your picture was quite enticing) and her comment was that her birthday request this year would be to replace the traditional shortcake with this recipe!


I made Dan Dan noodles last month and again referred to the recording as it has been awhile. I was grateful for the reminders, tips and tricks. Not to mention, I love to cook with Kirstie and Jody. They make it so much fun!
Most of the meals I make are from your repertoire. I think I have close to 60!


You will learn delicious recipes taught in real time from start to end by two good friends who want nothing more than to teach you how to cook and and have fun doing it. Class presentation is practical and encouraging with one chef starting and one playing 'catch up' so you do not miss anything and no question will go unanswered!
The recipe with food pack is perfectly packaged and always arrives on time to make it easy so you do not have to shop!
Several recipes from the Culinary Studio are in our regular rotation!
Excited to keep cooking with you Kirstie and Jody!

I was at the Studio for the very first class they held and I have continued to take classes for the past 13 years. While some things have changed over the years, the quality, knowledge and skills Jody and Kirstie bring to each class has not.The skills I learned through the their instruction have been used daily.

Parmesan brings salt, umami and richness, so it does considerably more than simply make the pesto cheesy. Because the cheese is already salty, we recommend adding your salt conservatively and adjusting after everything has been combined.
Grana Padano is also excellent here. It tends to be slightly milder than Parmigiano Reggiano and can be a little less expensive, which fits nicely with our pumpkin seed philosophy.
Great pesto should taste luxurious. It doesn’t have to cost a fortune.
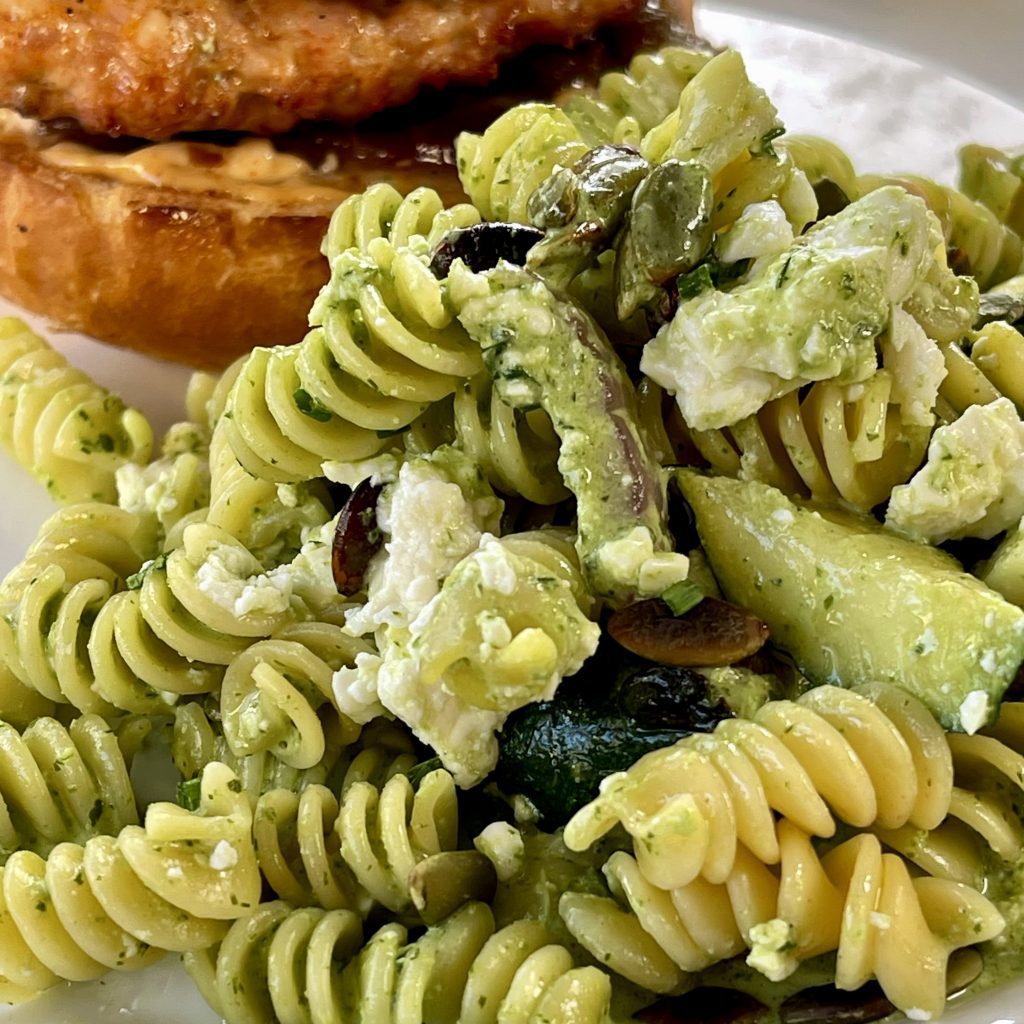
How to Use Basil Pesto with Pasta
For pesto pasta, loosen the pesto with a little hot pasta water before tossing it with freshly cooked pasta. Avoid aggressively cooking the pesto in a frying pan because high heat dulls the fresh basil flavour.
This is one of the most useful pesto tricks we can give you.
Before draining your pasta, scoop out a cup of that cloudy, starchy pasta water. Put your pesto into a large bowl, add a splash of pasta water and stir. Add the hot pasta and toss, adding more water as necessary until the pesto becomes glossy and coats the noodles.
The starch in the pasta water helps bring the olive oil, cheese and water together into a creamier sauce. You get beautifully coated pasta without adding cream.
And please don’t drain your pasta, dump pesto into a screaming-hot frying pan and cook it for five minutes. You just went to all that trouble to preserve the flavour of fresh basil.
Let the hot pasta warm the pesto.
What Else Can You Do with Basil Pesto?
Basil pesto is far more useful than a pasta sauce. Keep a jar in the refrigerator and you have an instant finishing sauce for grilled meat, vegetables, sandwiches, eggs and plenty more.
We use it on grilled chicken, steak and fish, spoon it onto roasted vegetables, spread it inside sandwiches and wraps, or stir a spoonful into mayonnaise or Greek yogurt for a quick sauce. It’s fantastic with tomatoes and fresh mozzarella and equally good dolloped onto soup just before serving.
You can also spread it onto pizza after baking, stir it through warm potatoes, add it to scrambled eggs or spoon it over a grain bowl. Essentially, if dinner looks like it needs something green and delicious, pesto is a pretty good answer.
Jody and Kirstie’s Hot Tips
- Toast your pumpkin seeds. A few minutes in a dry pan gives them significantly more flavour.
- Cool the seeds before blending. There’s no reason to introduce extra heat to fresh basil.
- Use the basil leaves and tender stems. You don’t need to painstakingly remove every tiny stem.
- Pulse, don’t purée. Pesto should have texture.
- Add the olive oil toward the end. This reduces unnecessary processing and gives you better control over consistency.
- Grate your own cheese. It incorporates better and tastes better.
- Save your pasta water. A splash turns pesto into a silky pasta sauce without cream.
- Freeze the summer surplus. Future January-you will be extremely pleased with August-you.
Substitutions
Pesto is a technique as much as it is a recipe, so you can change the greens, seeds, cheese and acidity while keeping the basic structure intact.
If you don’t have pumpkin seeds, pine nuts certainly work, as do walnuts, almonds or sunflower seeds. You can replace some or all of the basil with parsley, arugula or other tender herbs and greens.
Pecorino can replace Parmesan if you want something sharper and saltier. If you’re making a dairy-free pesto, omit the cheese and adjust the salt and acidity to compensate. Nutritional yeast can add savoury flavour, although it will create a different pesto rather than an exact Parmesan replacement.
What to Know and Avoid When Making Pesto
The biggest pesto mistakes are using tired basil, over-processing the sauce and forgetting to taste before adding more salt. Start with good ingredients and stop blending sooner than you think.
Avoid washing basil immediately before making pesto unless it genuinely needs it. If you do wash it, dry it thoroughly. Excess water dilutes the sauce and wet basil doesn’t store as well.
Don’t assume more garlic means better pesto either. Raw garlic becomes powerful very quickly, and our goal is to taste basil first. One clove gives us plenty.
Finally, don’t treat the ingredient measurements as handcuffs. Basil varies, cheeses vary and even olive oils behave differently. The recipe gets you very close, then your palate finishes the job.
How to Store Basil Pesto
Fresh basil pesto keeps best in an airtight container in the refrigerator with its surface protected from air. For longer storage, freeze it in small portions so you can thaw only what you need.
For refrigerator storage, transfer the pesto to a clean container and smooth the surface. Add a thin layer of olive oil or place food wrap directly against the pesto before covering. For best quality, we’d use refrigerated homemade pesto within several days.
Pesto also freezes extremely well. Spoon it into an ice cube tray or small containers, freeze until solid, then transfer the portions to a freezer bag or container. Those little pesto portions are perfect for pasta, soups and sauces when basil season is long gone.
Basil Pesto FAQ
Can I make pesto without pine nuts?
Absolutely. We use toasted pumpkin seeds in our basil pesto. They’re affordable, readily available and give the pesto excellent richness and texture without overpowering the basil. In fact, you can even make pesto without basil!
Do pumpkin seeds taste different from pine nuts in pesto?
Yes, slightly. Pumpkin seeds have a mild earthy, nutty flavour, while pine nuts are softer and more buttery. Once combined with basil, Parmesan, garlic and olive oil, pumpkin seeds make a fantastic pesto in their own right.
Should you toast pumpkin seeds for pesto?
We recommend it. Toasting develops deeper nutty flavours and only takes a few minutes. Let the seeds cool before adding them to your basil.
Why is my homemade pesto bitter?
Over-processing strongly flavoured extra virgin olive oil can emphasize its bitter notes. Use short pulses, add the olive oil toward the end and stop processing as soon as you reach the texture you want.
Can you freeze basil pesto?
Yes. Pesto freezes beautifully. Freeze it in small portions or ice cube trays so you can thaw exactly what you need for pasta, sauces or soups.
Should pesto be heated?
We prefer not to cook basil pesto directly over high heat. For pasta, loosen it with pasta water and toss it with freshly cooked noodles. The heat from the pasta warms the pesto while preserving its fresh basil flavour.
Key Takeaways
- Homemade basil pesto takes about 10 minutes and tastes dramatically fresher than most store-bought versions.
- We prefer toasted pumpkin seeds to pine nuts because they’re delicious, affordable and easy to find.
- Pulse your pesto rather than over-processing it to preserve texture and fresh basil flavour.
- Add olive oil toward the end and use pasta water to turn pesto into a silky pasta sauce.
- Make extra while basil is abundant because pesto freezes beautifully.
If you want to become a more confident cook rather than simply collect more recipes, check out our on-demand cooking classes. We teach the techniques and science behind what you’re making, and you can cook along at your own pace. No Cook is Left Behind.
About Jody and Kirstie
Jody O’Malley and Kirstie Herbstreit are the Red Seal certified chef co-owners of The Culinary Studio in Waterloo, Ontario. Jody is a Stratford Chefs School graduate (2002) and Kirstie trained at SAIT in Calgary (2003). Together, they bring over 20 years of professional cooking experience and 15 years building one of Canada’s leading culinary education businesses. They teach home cooks the science and techniques behind great food, not just the recipes, and co-host the Chef Over Your Shoulder podcast alongside Amy Schlueter.