This post contains affiliate links
How to Make the Best Braised Beef Recipe (Our 15 year old recipe!)

We’ll start by apologizing. Sorry it took us so long to put this recipe up on our blog! It is one of our all-time favourite recipes–try it and you will find out why! And if you want to cook alongside with us, click HERE for the accompanying FREE cooking class! This will give you the skills to confidently make many other braised dishes.
This braised beef recipe is an ode to local farmers, butcher shops, and the kind of cooking that rewards patience. It was one of the very first dishes we cooked together as new business partners (15 years ago!!) and it’s one we return to again and again, not because it’s fancy, but because it’s timeless.
Braising is hospitality at its purest. You take a tough, hardworking cut of beef and give it time, heat, and care until it becomes deeply flavourful and impossibly tender. When done properly, braised beef outshines cuts that cost twice as much.
This is also a dish that demands to be made ahead. Letting the beef rest overnight allows the meat and sauce to become one, and that’s when this braised beef truly earns its place as one of our favourite recipes of all time.
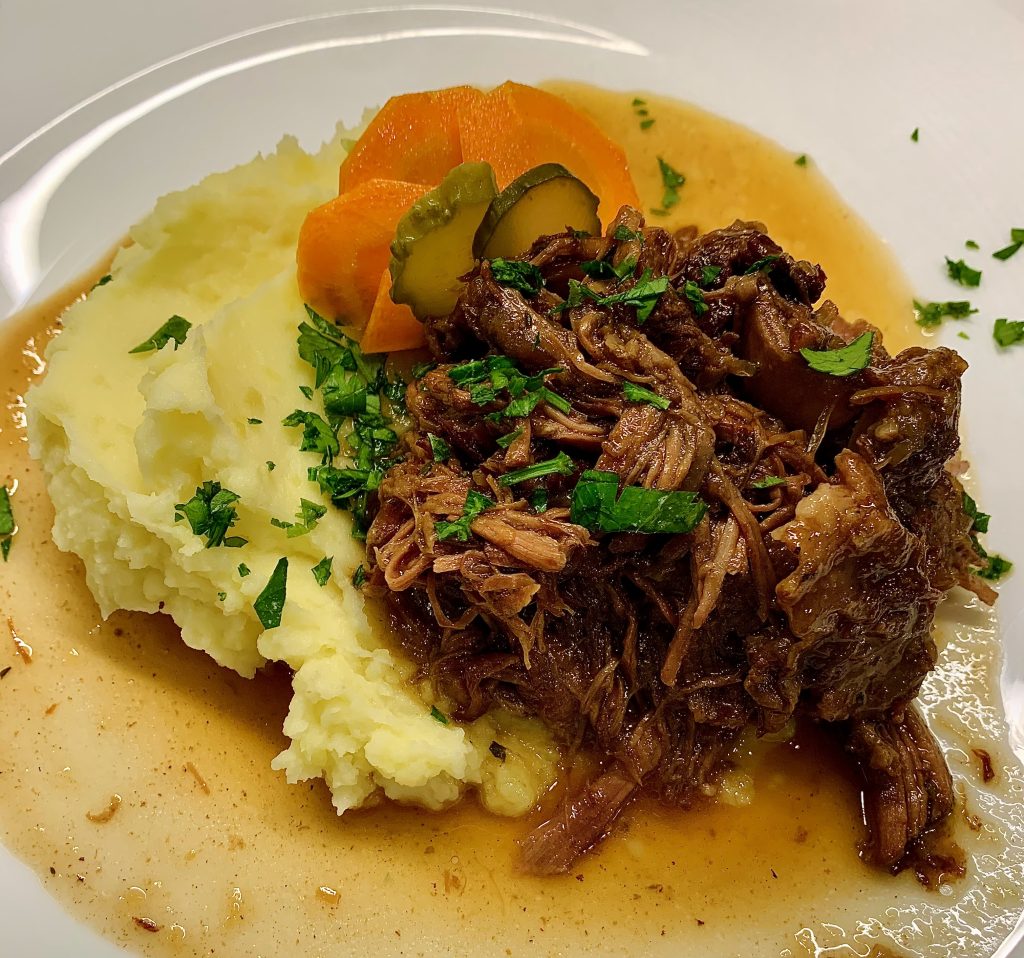
We always serve this with a bright, quick vegetable escabeche to cut through the richness. Don’t skip it. Accompany the braised beef with everything from buttered egg noodles, mashed potatoes or creamy polenta. It all works.
Why This Braised Beef Recipe Works
-
Uses an affordable, flavour-forward cut (we ask for blade roast to be cut into thick pieces)
-
Deep browning builds serious depth (TIP: when you think it’s brown enough, give it another minute or two)
-
Red wine and tomatoes create a rich, balanced sauce
-
Long, slow cooking guarantees fork-tender meat
-
Even better the next day (ideal for entertaining)
This is classic braising, done right.
- Prep Time: 45 minutes
- Cook Time: 3 hours
- Total Time: 3 hours + 45 Minutes
- Yield: 6–8 Servings 1x
Ingredients
- 1 4–lb blade roast, cut into thick pieces (about 6-8 1 1/2-2 inch pieces)–ask your favourite butcher to do this for you if you like!
- Diamond Crystal Kosher Salt, as needed
- oil, as needed (neutral cooking oil such as sunflower or grapeseed)
- 2 onions, thinly sliced
- 1 large clove garlic, thinly sliced
- 4–5 generous sprigs of thyme
- 1–2 sprigs rosemary
- 1–2 large carrots, sliced in half lengthwise, and then into 1/2 inch slices or matchsticks
- 1/2 bottle of red wine
- 2 cups good quality whole canned tomatoes
- 2 cloves garlic, smashed
- 3/4 cup vinegar, rice wine, apple cider or a good white wine vinegar
- 1/4 cup water
- 1/4 cup sugar
- 1/8–cup kosher salt
- 2 Tbsp. freshly chopped herbs such as tarragon, parsley or dill
- 1 large carrot, thinly sliced (use a vegetable peeler to get nice thin ribbons)
- 1 zucchini, thinly sliced into ribbons
- 1/2 medium red onion, thinly sliced
- 1/2 fennel bulb, thinly sliced
Instructions
- Begin by salting the meat (if you have the time, salt the meat the day before for even better results). Salt all sides of the meat with abandon—sprinkle out of hand, be liberal, about 4 tsp. in total
- Brown the meat: choose to brown in a metal frying pan or a heavy large pot with which you will braise in. Whatever you choose you will need to do two things: pre-heat your pot or pan over medium-high heat until it is very hot (without oil) and likely brown the meat in batches.
- Once your pot/pan is hot, add a thin layer of oil, followed by the meat, not crowding your pot/pan. You will likely do this in batches.
- Let brown until the surface is really crusty and dark; turn over and brown other side. Turn on your hood fan & open a window. It should be loud and a bit smoky. A good rule of thumb: when you think it is brown enough, give it another minute.
- Continue to brown the meat in batches but take care— do not have your pot/pan so hot that the bottom begins to blacken. If this starts to happen before all of the beef is browned, add a splash of water or wine to the bottom, scrape clean, and then continue with remaining beef, starting with step 3. You can adjust your heat a little lower if this begins to happen.
- Once beef is all browned, remove to a bowl off to the side.
- Add onions to pot; stir constantly with a wooden spoon to release their juices, as this begins the deglazing process (dissolving all of those lovely browned bits on the bottom of the pan)
- Once onions are soft and lightly browned, add in garlic, herbs and carrots. Cook and stir for a few minutes before adding the wine.
- Bring the wine to a boil, continuing to scrape up any browned bits from the bottom of the pot. Let wine reduce by about half.
- Stir in tomatoes, breaking up any large pieces with your wooden spoon, and allow to thicken & concentrate for a few minutes.
- You can now continue with the braising process: if you did all of your browning/deglazing in a frying pan, place everything now into a heavy pot with a lid along with all of the beef and any collected juices that may have formed in the bowl.
- Add enough water just to cover
- Bring to a simmer over medium-high heat.
- You have two options now: 1. Cover, and then cook in a 325°F oven for 2 ½-3 hours or 2. Cover and cook over low heat for 2 ½-3 hours.
- Your braised dish is ‘done’ when the meat is completely fork tender, but remember it is best when allowed to cool, then cover and chill overnight in the refrigerator.
- Gently reheat on the stove over medium heat for 30-45 minutes or in a 350°F oven for 45-60 minutes.
- Sauce should be thick. If it needs thickening, remove the meat with a slotted spoon and bring the liquid to a boil for a few minutes over medium-high heat.
- Return the meat back to the pot and then ‘pull’ meat apart using 2 forks. Enjoy this beef on its own, in a bun, with mashed potatoes, couscous, noodles etc., but be sure to serve with some pickles!
- To make the Escabeche: In a saucepan, combine garlic, vinegar, water, sugar, salt and herbs. Bring to a boil over high heat. Reduce heat and simmer until sugar is dissolved, about 3 minutes. Have vegetables ready in a wide bowl. Pour hot pickling liquid over vegetables, cover and refrigerate for 15 minutes or for up to 12 hours.
- Keeps well in the refrigerator for about a week.
Notes
Make-Ahead, Storage & Freezing
-
Make ahead: Best made 1–2 days in advance
-
Refrigerate: Up to 4 days
-
Freeze: Up to 3 months (freeze meat submerged in sauce)
-
Reheat gently to preserve texture
FAQs About Braised Beef
What cut is best for braised beef?
Blade roast, chuck, or shoulder cuts are ideal — they become tender with long cooking.


I subscribe the updates and get links to recipes - I recently made the Olive Oil Lemon cake. It turned out delicious – as you said in the description, very moist! My daughter has a birthday in strawberry season and typically she asks for strawberry shortcake with a traditional shortcake recipe… I served the lemon came this weekend with a bit of whipping cream and fresh strawberries (your picture was quite enticing) and her comment was that her birthday request this year would be to replace the traditional shortcake with this recipe!


I made Dan Dan noodles last month and again referred to the recording as it has been awhile. I was grateful for the reminders, tips and tricks. Not to mention, I love to cook with Kirstie and Jody. They make it so much fun!
Most of the meals I make are from your repertoire. I think I have close to 60!


You will learn delicious recipes taught in real time from start to end by two good friends who want nothing more than to teach you how to cook and and have fun doing it. Class presentation is practical and encouraging with one chef starting and one playing 'catch up' so you do not miss anything and no question will go unanswered!
The recipe with food pack is perfectly packaged and always arrives on time to make it easy so you do not have to shop!
Several recipes from the Culinary Studio are in our regular rotation!
Excited to keep cooking with you Kirstie and Jody!

I was at the Studio for the very first class they held and I have continued to take classes for the past 13 years. While some things have changed over the years, the quality, knowledge and skills Jody and Kirstie bring to each class has not.The skills I learned through the their instruction have been used daily.

Why brown the meat so deeply?
That crust equals flavour. It’s the backbone of the sauce. It’s called the Maillard Reaction, when the sugars in the meat brown and intensify in flavour.
Can I skip the overnight rest?
You can, but you shouldn’t. The flavour improves dramatically after resting.
Substitutions & Variations for Braised Beef
This braised beef recipe is wonderfully flexible and forgiving. Here are a few smart substitutions that still deliver exceptional results:
Cut of Beef
-
Blade roast is ideal, but you can also use chuck roast, shoulder, or cross rib.
-
Avoid lean cuts — braising relies on fat and connective tissue to become tender.
Wine Substitutions
-
Swap red wine for beef stock if you prefer not to cook with alcohol.
-
A splash of balsamic vinegar or red wine vinegar at the end can help balance the sauce if skipping wine.
Tomatoes
-
Whole canned tomatoes are best, but crushed tomatoes work just fine.
-
In a pinch, substitute passata for a smoother sauce.
Herbs
-
Fresh thyme and rosemary are classic, but bay leaves or oregano are excellent additions.
-
If using dried herbs, reduce the amount by half.
Vegetables
-
Add parsnips, celery, or mushrooms for extra depth.
-
Keep vegetables hearty — delicate vegetables will break down too much during long braising.
Serving Variations
-
Serve over mashed potatoes, polenta, egg noodles, couscous, or rice.
-
Shred the beef and use it in sandwiches, wraps, or tacos with the escabeche.