
This post contains affiliate links
Quick Turkey Chef Tips!
Listen to the podcast here!
- Turkey Purchase: Buy the right size turkey: 1-1.5 lbs per person.
- Thaw safely in the fridge: 24 hours for every 4-5 lbs
- Brine for moisture and flavour. Dry brine for crispy skin, wet brine for juicy bird
- Season simply: salt, pepper, olive oil & fresh herbs
- Stuffing (Dressing): cook outside the bird
- The pan matters! Skip the domed lid when roasting, use a rack for air circulation
- Oven strategy: Start at 425°F for colour, then reduce heat and go slow & slow for juiciness
- Internal temps: Breast 160°F, thigh 175°F, stuffing 165°F
- Rest for at least 30 minutes before carving.
Welcome to the Ultimate Turkey Guide! Cooking a turkey is one of those kitchen rites of passage. Whether it is Thanksgiving, Christmas, or a special Sunday feast, people often have strong opinions (and a little anxiety) about how to do it right.
There are just so many questions and choices to make when cooking a turkey! Should you roast low and slow? Smoke it all day? Deep fry for that shatteringly crisp skin? There are all the “extra” techniques: basting, barding, tenting, spatchcocking, and butter baths that promise the juiciest turkey ever.
The truth? There is not just one way to do it. But there are things you should know before committing to a method, so you get the best bird possible.
This guide covers all the popular turkey cooking practices: oven, smoker and deep-fryer. Plus, we will cover modern and traditional techniques that you grew up with, so you can choose the approach that fits your kitchen, your equipment and your style.
Buying the Turkey: Fresh vs Frozen
The first step in cooking a turkey happens before you ever turn on the oven or fire up the smoker!
Frozen Turkey: Easy to find and usually more affordable. But it must be thawed before cooking. Plan for 24 hours of fridge thawing for every 5 pounds of turkey.
Fresh Turkey: More delicate flavour, often juicier. You will need to order ahead of time from your local butcher.
Fore Quarter Butcher Shop gets their turkeys from Scotch Line in Elmira. Really good.
How big a Turkey do you need?
General rule: 1 to 1.5 lbs of turkey per person
One pound if you do not want leftovers! One and a half pounds if you love turkey soup, casseroles or Kirstie’s Ultimate day-after turkey sandwich (she might prefer this to the feast itself!). Try our Turkey Gumbo with your leftovers or our favourite Turkey, Almond & Apple Salad!
Preparing the Turkey
Once the bird is thawed, it is time to prep! Remember, a frozen bird can take up the 3 DAYS to thaw in the refrigerator.
- Remove from packaging.
- Save the giblets and neck for making stock for a delicious gravy ahead of time!
- Rinse the inside and out with cold water.
- Pat completely dry with paper towels.
How to cook a turkey: Deep-fry, oven-roasted or smoked?
Deep-Fried Turkey
If you have ever had a deep-fried turkey, you know why people rave about it: insanely juicy meat, perfectly crisp skin, and it cooks in a fraction of the time. But it comes with big safety considerations.
Safety First when deep frying a Turkey
- Do not wet brine. Oil and moisture do not mix. Adding a wet-brined bird to hot oil can cause dangerous bubbling or even fire. Stick to a dry brine.
- Oil level test. Before frying, test your pot with cold water. Place the turkey (still in its packaging) in the pot and fill with water until the bird is covered by about 1 inch. Remove the turkey, mark the water line, empty and dry the pot completely, then fill with oil up to the line.
- Temperature management. Start heating your oil at 250°F and bring it up to 350°F. This gradual rise prevents bubbling over.
- Type of oil. Canola, vegetable or peanut oil works best. For a 14 lb turkey in a 30-gallon pot, you will need about 3.5 gallons of oil (just over 13 litres)
Cooking Time for Deep Frying a Turkey
Plan on about 3-4 minutes per pound. Deep-fried turkey is fast, so have everything ready before you drop it in.
Smoking a Turkey
Smoking adds depth of flavour and a beautiful bronzed skin. We love popping a turkey on our Traeger for a ‘set it & forget it’ type process.
- Use fruitwoods like apple or cherry for mild, sweet smoke or hickory for bolder flavour
- Maintain a smoker temperature of 225-250°F
- Allow 30-40 minutes per pound
- Like roasting, resting is key
- Like with roasting, resting is key.
Oven-Roasted Turkey Basics
For those sticking with the classic oven roast:
- Roast at 325-350°F for steady, even cooking, (see Chef’s compromise below)
- Expect 13-15 minutes per pound (unstuffed)
- Always rest the bird for at least 30 minutes before carving.
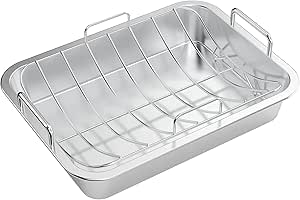
The Right Pan for Cooking a Turkey
Forget the old-school enamel roasting pan with the domed lid. You know the one…it is black with white specks…your Gramma had one. This roasting pan, combined with the lid, steams the turkey, preventing crispy skin.
- Best: Roasting pan with a rack, allows the air to circulate and prevents simmer in its own juices
- No rack? Use carrots, celery and onion halves as a natural trivet
- Small turkey? A sheet pan with a cooling rack works great.
We like this cheap & cheerful pan. 16 inches, with a rack. We often avoid any ‘non-stick’ roasting pans, and this will repel browning to occur on the bottom of the pan. Key for Gravy!
When I am cooking the turkey, should I cover it?
This is one of the most common questions when cooking turkey, and the answer depends on your method of cooking:
Oven-roasting: Do not fully cover the turkey for the entire cook. Covering traps steam and prevents crispy skin. Leave the turkey uncovered, but have the foil ready. If the breast browns too quickly, loosely tent that area.
Smoking: No cover is needed; the lid of the smoker does the job. Just keep the vents adjusted for proper airflow.
Deep frying: Absolutely not. The turkey must be uncovered to fry safely and evenly.
Chef’s Tip: The foil is a shield. Do not fully wrap the bird in foil, or it will steam. Use it sparingly and strategically to ensure the turkey does not burn.
What is the oven temperature when cooking a Turkey?
It is all about finding the sweet spot!
High Heat (400-450°F)
PROS: Crispy skin, faster cooking
CONS: More moisture loss. Uneven cooking for a large turkey
Low & Slow (275-325°F)
PROS: Juicier meat, more even cooking
CONS: Skin may not crisp up
The Chef’s Compromise:
Start at 425°F for the first hour. This will ensure that you have nice browning and crispy skin
Reduce to 325°F (oven) or 275°F (smoker) until the turkey is done
Brining: The Moisture & Flavour Secret
Why brine a turkey before cooking?
Brining helps ensure tender, juicy meat and enhances flavour. Even an overcooked brined turkey will often taste juicier than a perfectly cooked but un-brined bird. Click HERE for our full blog on bringing, and read on for basic rules!
Brining works by allowing salt and flavours to penetrate the meat cells, locking in moisture during the cooking.
Dry Brine
- Use just over 1 tsp kosher salt per pound of turkey
- Rub salt inside the cavity, under the skin and all over the outside.
- Wrap in plastic and refrigerate for 24 hours up to 3 days.
- Benefits: Crispy skin, deep flavour, less mess
Wet Brine
- Rule of thumb: ½ cup kosher salt per 4 litres of water.
- Brine for 1 hour per pound of turkey
- Wet brining should not be done if you are deep-frying your turkey
- Add aromatics (3-4 bay leaves, 4-6 sprigs thyme, ½-1 apple/onion, 2 ribs celery, 1 carrot, 2 cloves crushed garlic, 2 Tbsp peppercorns, citrus peel, parsley stems, brown sugar or honey).
- Substitute some water for apple juice, chicken stocks, whiskey, bourbon, soy sauce, or vinegar for more complexity
Chef Tip: Do not brine for longer than 48 hours. Beyond that, the turkey gets too salty and the meat texture turns mushy.
Crispy Golden Skin
Want that magazine-cover golden turkey? Follow these rules:
- Drain the cavity thoroughly after brining
- Pat the skin dry; moisture is the enemy of crispiness
- If possible, let it sit uncovered in the fridge for 24 hours to dry
- Before roasting: Rub with olive oil or butter (over & under the skin for more flavour!)
Seasoning and Spice Rubs
For the most part, we keep our seasoning simple: salt, pepper and olive oil. For the holidays, traditional herbs (thyme, rosemary, sage) add a nice aroma.
Be careful with store-bought spice rubs. If salt is the first ingredient, adjust your brine accordingly. High sugar in a rub and you risk burning the skin during the long roast. Either skip or protect the skin with foil. If you decided a spice rub is the way to go, cook on a lower heat to prevent the spices from burning.
Stuffing (or Dressing) for Turkey:
This is one of the biggest debates when cooking a turkey.
Stuffing Inside the Turkey:
- Stuff just before roasting
- Pack loosely
- Internal temp must reach 165F in the centre of the stuffing.
Stuffing Cooked Separately
- Safer and cooks more evenly
- Produces crispier edges
Skip the stuffing and fill the cavity with aromatics instead: onion, garlic, lemon, apple, fresh herbs, celery or carrots. Here’s a quick recipe for a baked stuffing recipe, good for about 8 people. Feel free to double it up.
BAKED STUFFING
2 turkey necks
1/2 cup butter, plus more for greasing
1 cooking onion, diced
2 ribs celery, diced
5-6 sprigs fresh thyme, chopped
2 sprigs fresh rosemary, chopped
2 sprigs fresh sage, chopped
3-4 sprig fresh parsley, chopped
Salt & pepper, as needed
6 cups bread cubes (equivalent of about 1 baguette)
1-2 cups stock or water
- Preheat oven to 375℉. Grease a 9×13 baking dish generously with butter.
- Cut bread into cubes and place on a baking sheet to dry out and crisp, 6-8 minutes, then place in a mixing bowl.
- Preheat a large frying pan over medium heat.
- Drizzle pan with oil then sadd turkey necks and brown well. Remove to a plate once browned.
- Add in butter.
- Once butter is melted, stir in onion and celery. Season with salt and cook until soft but not brown.
- Stir in thyme, rosemary and sage. Cook for 1 minute.
- Toss the onion mixture with the bread and the parsley. Add stock/water, enough just to moisten. Taste for seasoning, adding salt & pepper, if necessary.
- Use a spatula to scrape into your baking dish. Nestle turkey necks into the bread cubes. Cover with foil and bake for 30-40 minutes. Remove foil for a further 10 minutes to crisp up.
Flattening the Bird (Spatchcocking)
Spatchcocking is removing the backbone and laying the turkey flat, which dramatically cuts cooking time and promotes even cooking.
Flattening the bird spreads out the legs; they cook faster, while the breast in the centre stays juicy. The tradeoff is that you can’t stuff the bird with dressing. If you need to follow Gramma’s recipe, this is not the method for you.
Cook the legs and breast separately.
This is a Chef’s trick when you want perfectly cooked meat across the board. Turkey parts can be roasted or smoked individually. Smaller pieces can be cooked at higher heat for crispy skin.
This method will not allow you to present the whole turkey at the table and make a ceremony of carving it but it guarantees juiciness.
We love this method when we are cooking everything ahead of time! The carcass can be used to make stock that becomes gravy while you are roasting the legs and breast. The meat can be carved when it is cold and gently warmed in stock or a butter bath.
Chef’s Note: If we are smoking our turkey, we do it the day before. The turkey is removed when it is slightly underdone. We allow it to rest until it is cold, carve it up and place it in a mixture of stock and lots of butter, to be gently warmed just before serving.
Trussing, Barding, Basting, Butter Baths, Tempering and Ice Baths when cooking the Turkey
Should I truss the turkey?
Trussing ties the legs close to the body for even cooking. Some sheds swear by it. Personally, we skip it, especially for smoked turkeys.
Our alternative: Remove the wings and use them (plus the neck) to make stock for gravy. If you have a wing-lover at the table, leave them on.
Do I need to baste the turkey?
Many people baste their turkey because their mother did and their mother’s mother did. The idea behind basting is to promote even browning and keep the meat moist. The reality is: you can achieve the same results in other, less time-consuming ways.
- Every time you open the oven, the temperature can drop by 50°F. That adds extra cooking time,
- If you do baste, use the fat that rises to the top of the pan juices. This helps protect the breast meat.
- Browning will naturally happen with the long cooking time. A drizzle of oil before roasting works just as well.
What is barding?
These old-school techniques involve wrapping your turkey in fat (bacon or another layer of richness) to keep the lean meat from drying out. Some rub butter or mayonnaise under the skin for the same effect.
If you are going to bard, remove the fat wrapping during the last hour if you want crispy skin. Barding works best if you start the turkey at a lower temperature and finish at a high temperature, but there is the risk of overcooking if the temperature is not carefully managed.
What is a butter bath?
A butter bath can be seen as an extension of barding. Some cooks swear by resting their turkey in butter or rubbing it liberally for the last hour of cooking. The result is a moist, rich and golden turkey. Just be careful of flare-ups if you are smoking the turkey.
What is tempering or icing the turkey?
Tempering is allowing the turkey to sit out of the refrigerator for a bit before cooking to bring the temperature down and reduce the cooking time. Room temperature is considered the “danger zone” in a kitchen (where bacteria thrive), also if you are smoking your turkey, smoke is attracted to cold. I prefer to keep my turkey out of the danger zone and have the best opportunity to attract smoke.
Some believe icing the turkey breast slows down the cooking time and keeps it more in line with cooking the legs. This is a great deal of work for very little difference. We would be more apt to cook the legs and breast separately.
When is a Turkey Done?
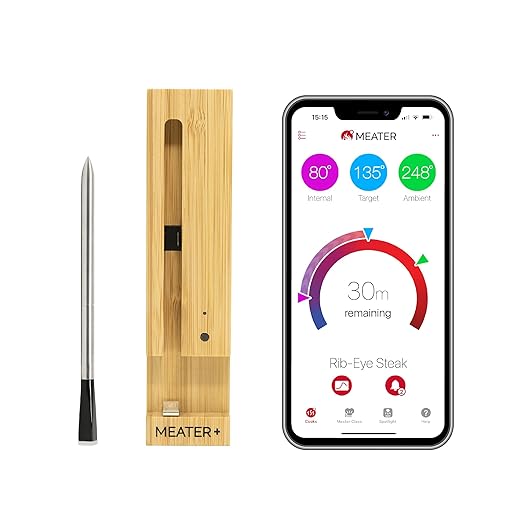
Don’t guess. Don’t rely on “minutes per pound”. Use a thermometer. We love THIS ONE by MEATER.
Breast: 157-160°F (carryover brings it to 165°F)
Thighs: 175°F
Stuffing (if inside): 165°F
Carryover cooking adds about 5°F as the turkey rests.
We will say it again. Use a thermometer. There are just too many variables relying on time alone. Here are some of the MANY variables that can occur when cooking a large piece of meat:
- What temperature is your oven/smoker at?
- Is the temperature accurate? (10 ovens set the same temperature can vary up to 20F)
- How many times did you open the oven?
- What else are you cooking in the oven?
- What was the temperature of the turkey when you started cooking?
- Is your oven set to convection or not?
- How even is the heat in your oven?
- How close is the turkey to the heat source on a smoker?
- Is the turkey covered with foil?
- Is the turkey stuffed or unstuffed?
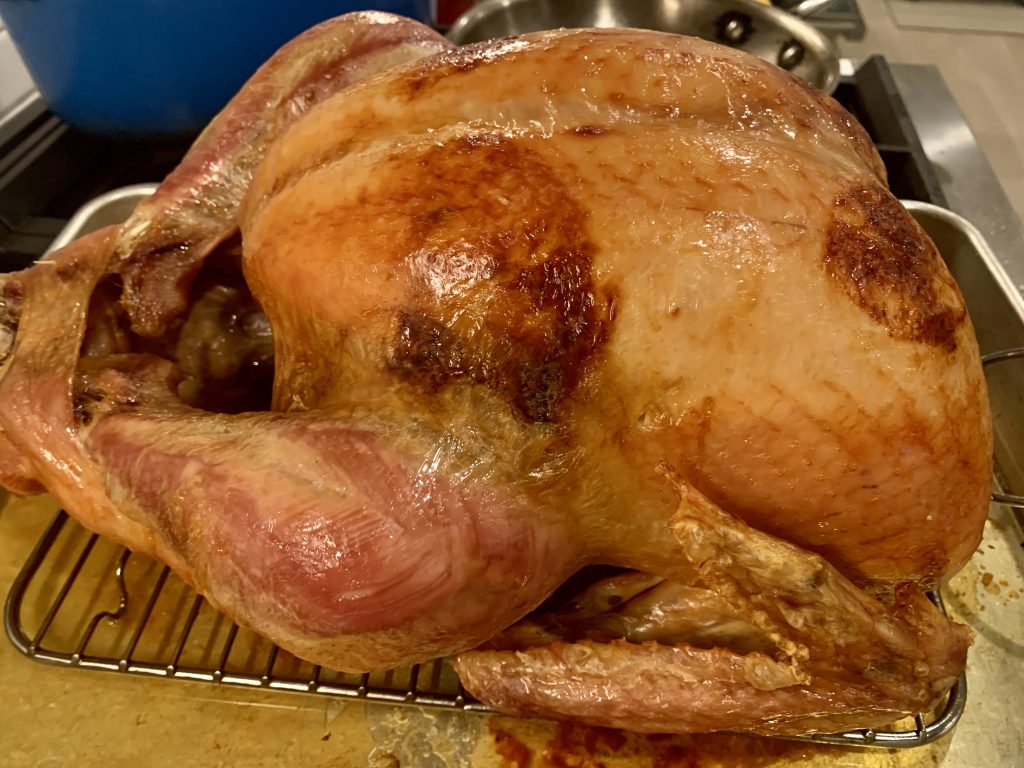
Resting the Turkey
Rest for at least 30 minutes before carving, up to 1 hour! This allows the juices to redistribute.
Should I tent my turkey with foil?
The logic behind tenting your turkey is to retain the heat, but there is a big downside. All that crispy skin that you worked hard to achieve? It will steam and soften under the foil. If you must tent, keep it very loose and brief.
Tent with foil if you want to retain the heat, but leave uncovered if you want crispy skin.
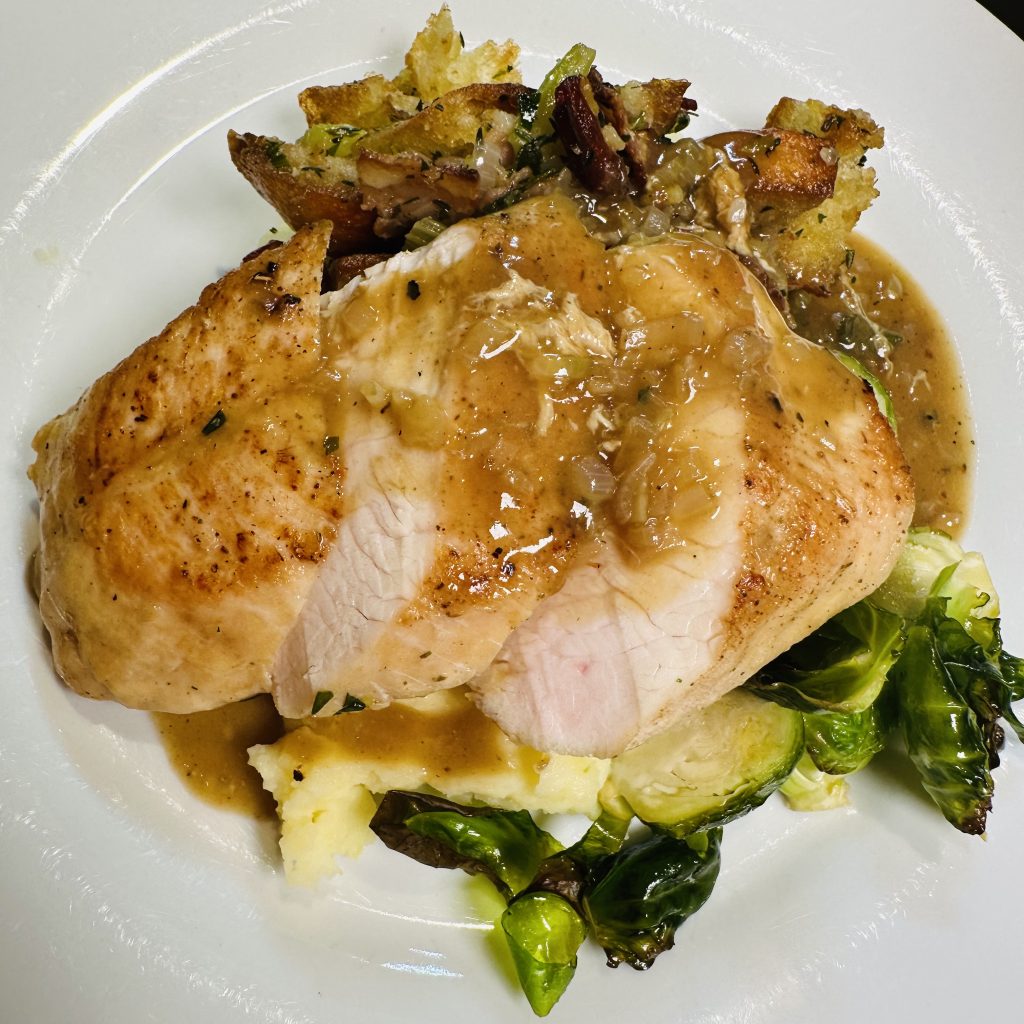
Carving and Serving
- Remove the legs and thighs first
- Slice the breast meat across the grain
- Serve the gravy, stuffing, and all your favourite sides. Take this COOKING CLASS for the Ultimate Classic Side Dishes!
What About Gravy?
Yes, no turkey dinner is complete without gravy! Simply put, gravy is putting the browned bits and extra fat to work. Flour is added to excess fat to form a roux, and stock or water to make the gravy. Sometimes logistics can be tricky, especially for make-ahead and ease. Here’s what we do:
- First make a stock, unless you’ve got some already. And it doesn’t have to be turkey stock. Homemade chicken stock is perfect, since you are starting with turkey drippings which have a lot of flavour. If you need to make stock, use Jody’s trick of removing the wings & neck before roasting to make a stock. Take a look HERE.
- Once turkey is out and resting, carefully pour about 1/2 cup of fat and any drippings into a medium-sized pot.
- Over medium heat, sprinkle in about 1/2 cup of flour. Cook to make a blond roux, about 2 minutes.
- Reduce heat to low and slowly whisk in stock, 6-8 cups. Season to taste.
What About Turkey Stock?
Read our full blog HERE on stock vs. broth, including our recipe for Turkey Stock. So you can all now fight over the carcass.
Storage Recommendations
- Refrigerate leftovers within 2 hours
- Store carved meat in shallow containers
- Eat within 3-4 days, or freeze for up to 3 months
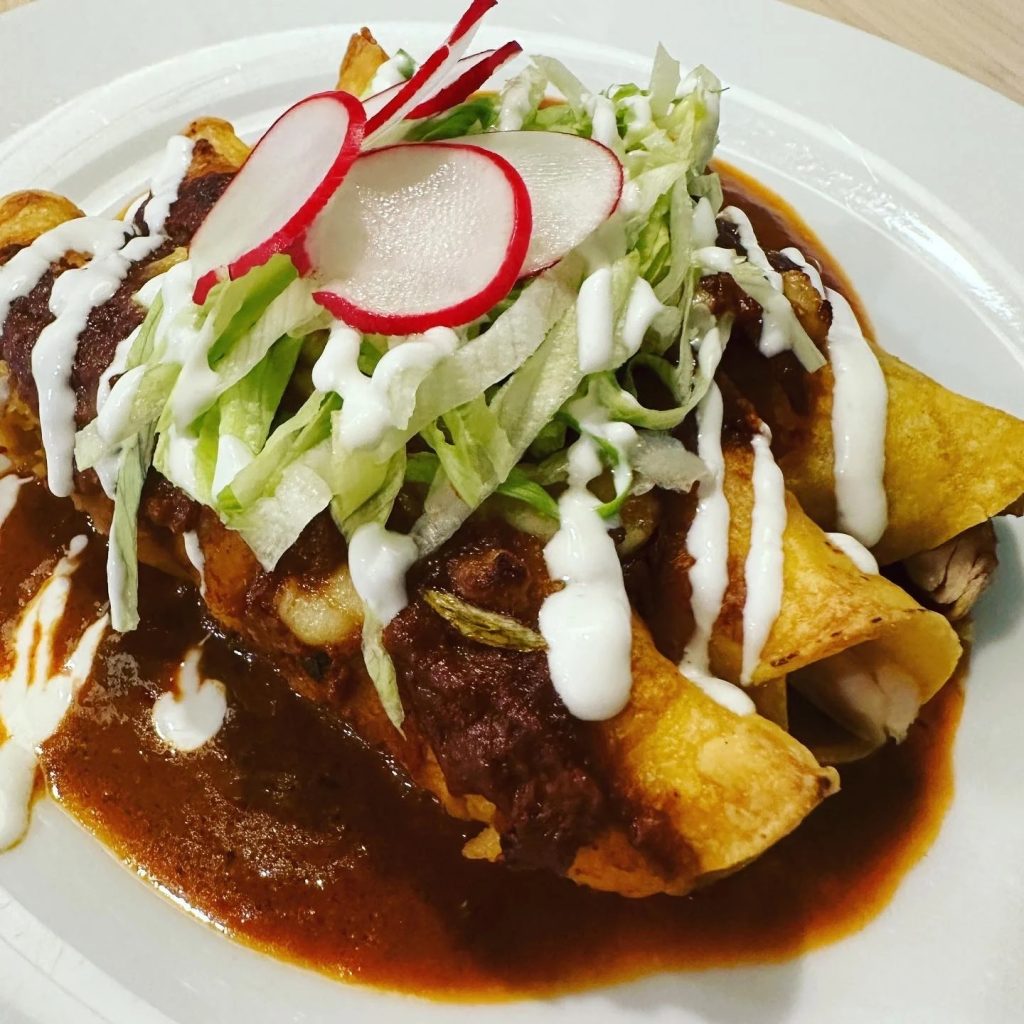
- Leftovers shine in soups, casseroles, salads and even Enchiladas!
What to Know/Avoid when cooking turkey
- Don’t brine for longer than 48 hours, as it will change the texture of the meat
- Do not rely on cooking time alone; time is your guideline. Always use a thermometer!
- Do not carve too soon. Rest to redistribute the juices.
- Avoid sugar-heavy rubs; they will burn during the long cooking process..
Substitutions
- Butter: Olive oil, duck fat or schmaltz (rendered chicken fat)
- Aromatics: Swap onion for fennel, apple or pear
- Brine Liquid: Replace some water with apple juice, stock or even beer!
- Herbs: Sage, rosemary, thyme, parsley stems, or bay leaves are interchangeable.
Cooking a turkey: Our Summary
Cooking a turkey is all about decisions: fresh or frozen, wet or dry brine, stuffed or not, high or low heat. Let’s not forget barding, trussing, tenting, spatchcocking, spice rubs and butter baths.
Once you understand the “why” behind each choice, the “how” becomes simple. You may want to go with the theatre of lowering your bird into the deep fryer, maybe you want to impress people with your smoking skills or keep things more traditional with roasting in the oven.
Choose the right size (leftovers are always the way to go!), plan ahead, choose how to season, but most importantly, TRUST YOUR THERMOMETER. Do this and you will serve turkey that is crispy on the outside, juicy on the inside, and your guests will be talking about it long after the dishes are done.
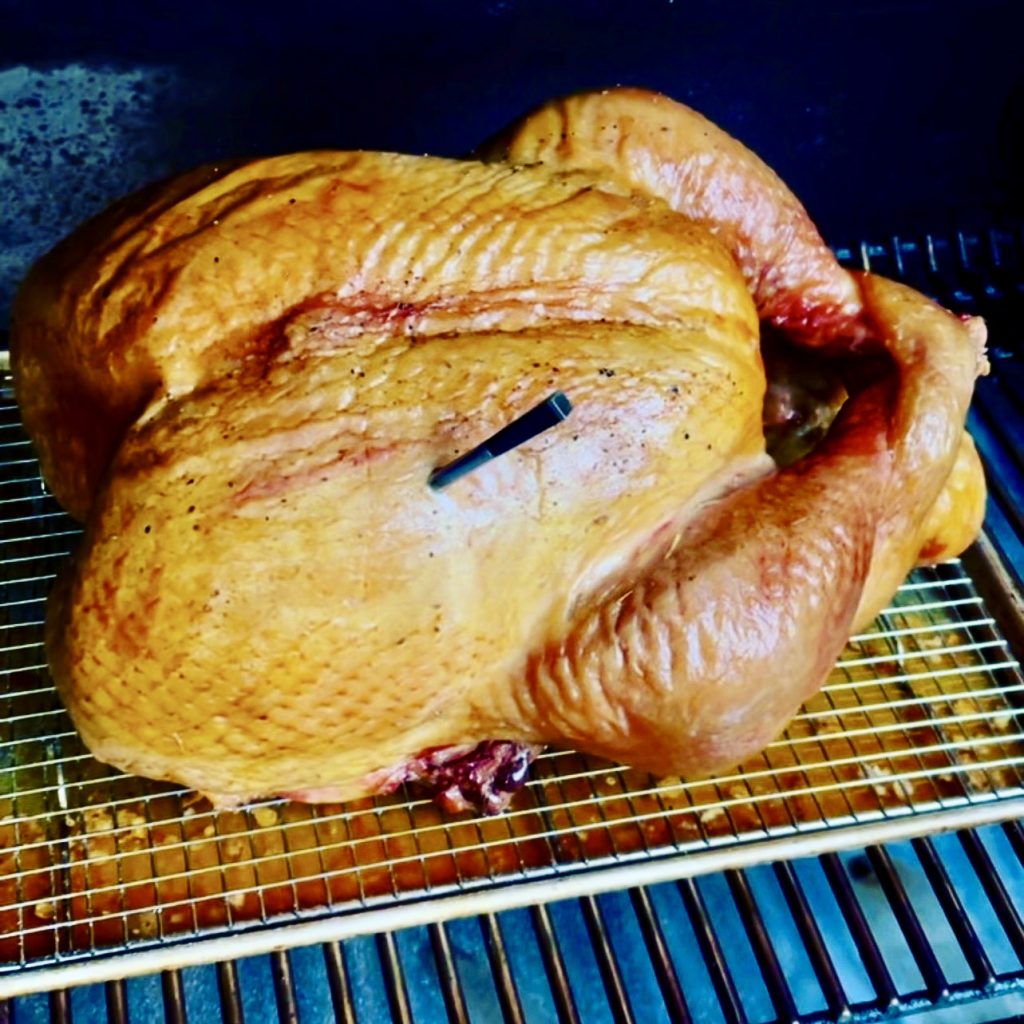
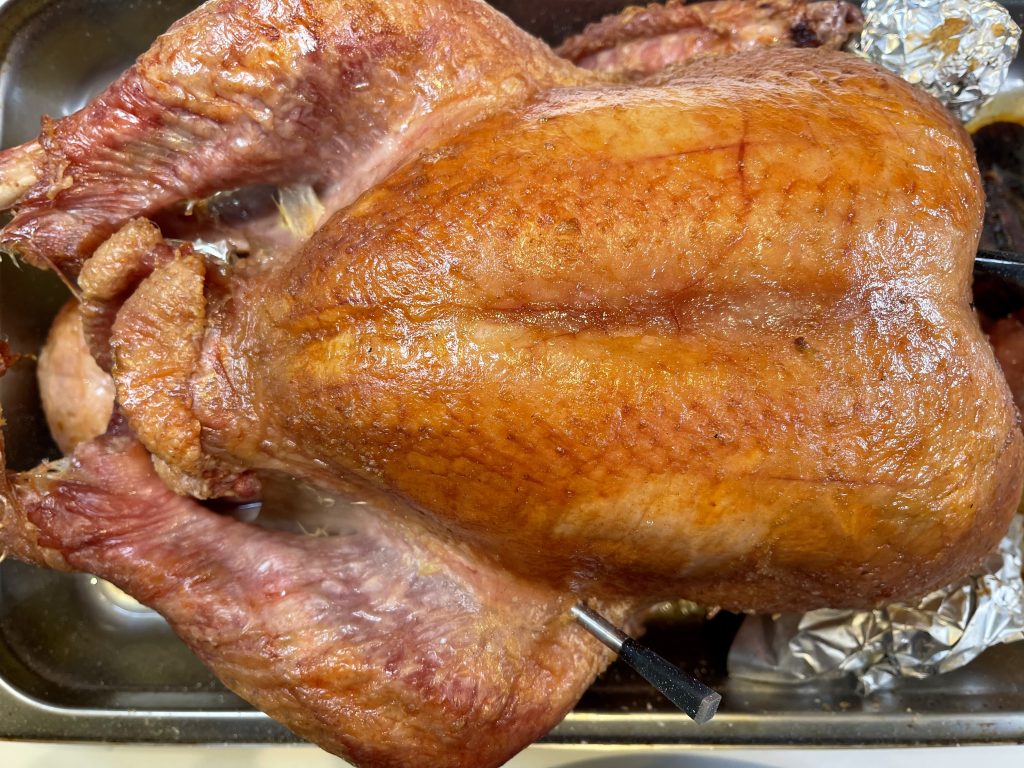
Our Traeger Turkey above, with the MEATER thermometer!


