
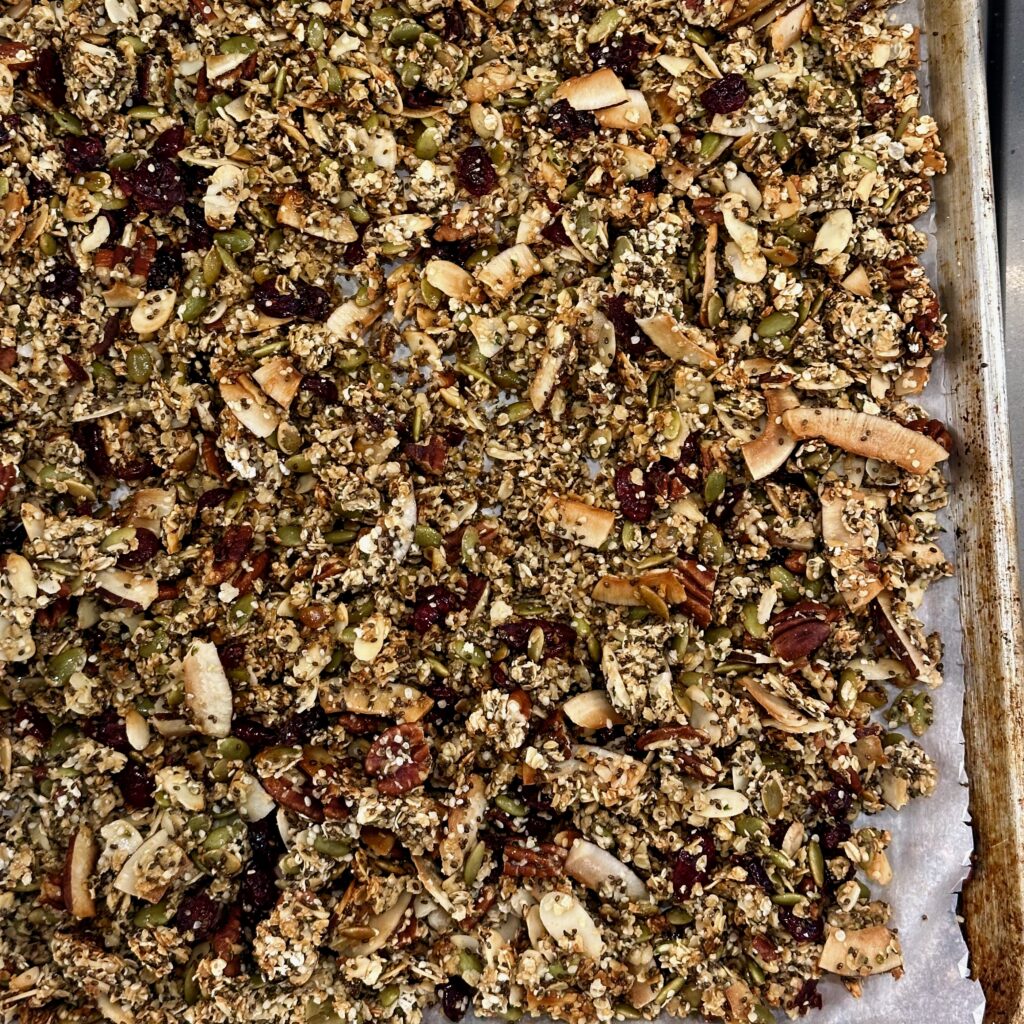
This post contains affiliate links
There are few things more satisfying than pulling a tray of golden, crunchy homemade granola out of the oven. Your kitchen smells incredible, you’ve got breakfast sorted for the week, and you know exactly what’s going into every bite.
And once you start making your own granola, it’s pretty hard to go back to the grocery store version.
The best part? Homemade granola is incredibly easy to make. You don’t need fancy equipment, expensive ingredients or much cooking experience. You just need to understand a few simple techniques.
As chefs, we’ve made made it our job to learn the difference between ordinary granola and REALLY good granola: The right sweetener. The right combination of nuts and seeds. A little salt. And one ingredient you might never have considered adding: egg whites.
Whether you’re looking for a healthier breakfast, a protein-rich snack or a gluten-free granola recipe, these ten tips will help you make a batch that’s crunchy, delicious and completely customizable.
And when you’re ready to put everything into practice, we’ve got you covered with our Super Crunchy Homemade Granola Recipe.
1. Your First Stop Should Be Bulk Barn
Let’s start with the shopping. If you’re making homemade granola, a trip to your local Bulk Barn is practically mandatory. Why? Because good granola is all about variety, and buying a dozen different bags of nuts, seeds and dried fruit at the grocery store can get expensive in a hurry.
This is not news: Bulk shopping allows you to buy exactly what you need, experiment with different combinations and avoid accumulating a cupboard full of half-used packages. You can also find some pretty unique products and cool packaging if your homemade granola is destined to become a gift.
Here’s what we like to look for:
- Rolled oats: The foundation of most homemade granola recipes.
- Slivered almonds: Wonderful texture, mild flavour and a little extra protein.
- Pecans: Rich, buttery and delicious when toasted.
- Pumpkin seeds: Crunchy, colourful and a great source of plant protein.
- Sunflower seeds: Economical, versatile and full of flavour.
- Hemp hearts: Small but mighty when it comes to protein.
- Chia seeds: Add fibre, texture and nutrients.
- Coconut strips: Toast beautifully and add another layer of crunch. Looks fantastic too.
- Dried cranberries: A little sweetness and chewiness to balance the crunchy ingredients.
One of the biggest advantages of shopping in bulk is the freedom to experiment. Maybe you love almonds but aren’t crazy about pecans. Swap them out. Perhaps you’ve got pumpkin seeds sitting in your pantry. Use those before buying more. And remember, just because an ingredient is available doesn’t mean you need to add it.
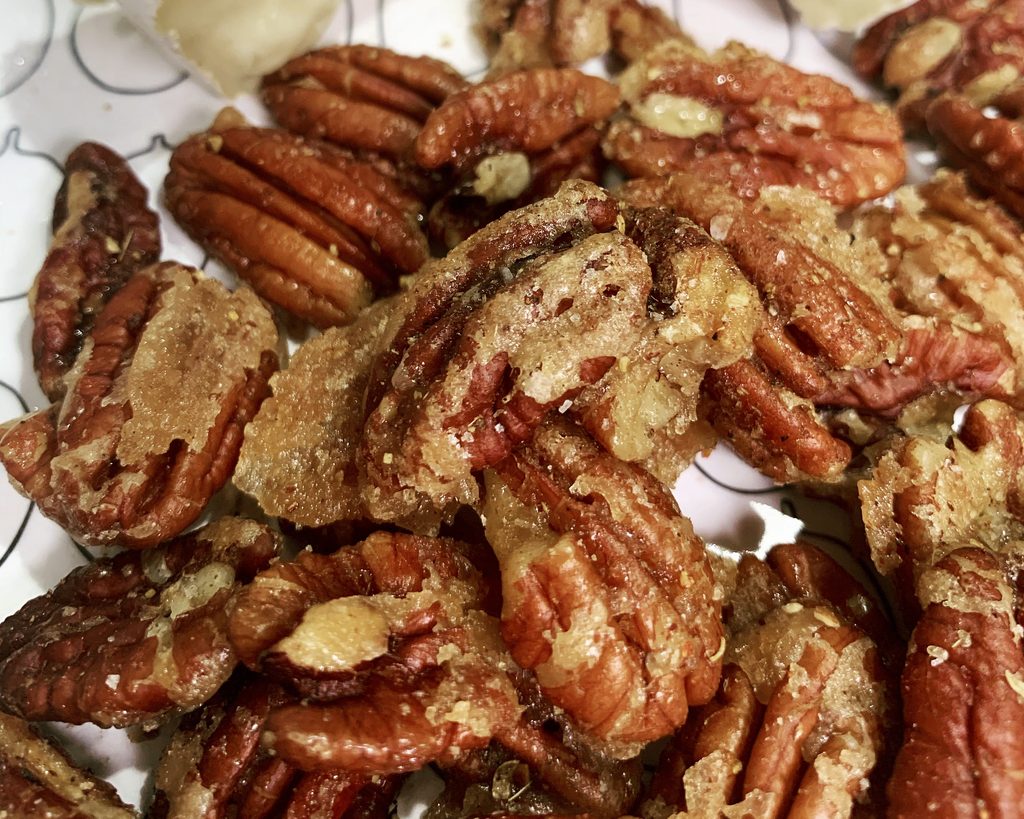
Chef Tip: Start with a few favourites and build from there. Granola should have variety, but you don’t need fifteen different ingredients to make it delicious.
One more thing: bulk doesn’t automatically mean cheaper. Compare unit prices, especially on expensive ingredients like nuts and hemp hearts. Buy only what you’ll use while the ingredients are fresh.
2. Maple Syrup Is Our Favourite Sweetener for Crunchy Granola
Let’s talk about sweetness. Most homemade granola recipes use honey, maple syrup, brown sugar or some combination of the three. We’re firmly on Team Maple Syrup as there is some good cooking science behind our preference.
Why maple syrup works so well
Maple syrup adds a lovely caramel-like flavour without overwhelming the oats, nuts and seeds. It also helps coat the ingredients evenly before baking. Here’s why: as granola bakes, moisture evaporates and the sugars become concentrated. Once the granola cools, that coating firms up and contributes to its crunchy texture.
Honey works too, but it behaves a little differently.
Honey contains a higher proportion of fructose, a sugar that readily attracts moisture (a.k.a Hygroscopic) Depending on the recipe and storage conditions, honey-sweetened granola can develop a slightly stickier or chewier finish. Maple syrup tends to give our granola the crisp, clean crunch we prefer.
Is maple syrup healthier than honey?
It comes from trees no? This is where things get interesting. Pure maple syrup contains small amounts of minerals, including manganese and riboflavin, along with some antioxidant compounds.
Honey also contains antioxidants and other naturally occurring compounds. At the end of the day, both, however, are concentrated sources of sugar.
Maple syrup has somewhat fewer calories and less sugar per tablespoon than honey, but neither should be considered a health food simply because it’s natural.
The real advantage of making granola at home is that you control how much sweetener goes into the recipe. You can use enough to create flavour and crunch without making your breakfast taste like dessert. What’s great is you can always sweeten up the end result, for instance, if you’re adding granola to yogurt, simply drizzle with more maple syrup if you like.
Chef Tip: Use pure maple syrup, not pancake syrup. They’re very different products, and the flavour of real maple syrup is worth it.
3. Egg Whites Are the Secret to Extra-Crunchy Granola
Here’s the ingredient that surprises people the most. Egg whites!
If you’ve ever wondered how to make homemade granola with those beautiful, crunchy clusters, egg whites are one of our favourite tricks.
In our recipe, we use four egg whites, whipped until foamy.
Why do egg whites make granola crunchy?
Egg whites are primarily water and protein. When you whisk them, you incorporate air and begin unfolding some of those proteins. As the granola bakes, the proteins set and help bind the oats, nuts and seeds together. At the same time, moisture evaporates, leaving behind a delicate structure that becomes crisp as it cools. The result is granola that holds together in satisfying clusters without needing excessive amounts of sugar or oil.
And unlike some granola recipes that rely heavily on syrup to create clusters, egg whites provide another way to bind everything together.
Do you need to whip egg whites to stiff peaks?
No, we’re not making meringue. Simply whisk them until they’re nice and foamy, then combine them with the maple syrup before adding the dry ingredients.
The goal is to distribute the egg whites throughout the mixture, not create a fluffy dessert.
Chef Tip: Make sure every ingredient gets coated. The egg white mixture needs to reach the oats, nuts and seeds to do its job. Want to see exactly how we use this technique? Follow our Homemade Granola Recipe.
4. Homemade Granola Can Be a Surprisingly Good Source of Protein
When people think of granola, they usually think of oats, fibre and carbohydrates. But with the right ingredients, homemade granola can contribute a meaningful amount of plant-based protein to your breakfast.
The trick is choosing ingredients that offer more than just crunch.
Our favourite protein-rich granola ingredients
| Ingredient | Approximate protein |
|---|---|
| Hemp hearts, 3 tbsp (30 g) | 10 g |
| Pumpkin seeds, ¼ cup (about 32 g) | 9–10 g |
| Almonds, ¼ cup (about 35 g) | 7 g |
| Sunflower seeds, ¼ cup (about 35 g) | 7 g |
| Chia seeds, 2 tbsp (28 g) | 5 g |
| Rolled oats, ½ cup dry (40 g) | 5 g |
| One large egg white | 3.5 g |
These are approximate values. Protein content varies by brand, weight and preparation.
Our granola includes hemp hearts, almonds, pecans, sunflower or pumpkin seeds, chia seeds and egg whites.
That’s a pretty impressive combination of ingredients.
Does that make granola a high-protein food?
It depends on the recipe and the serving size.
Nuts and seeds contain protein, but they’re also rich in fats, which makes them calorie-dense. Granola can be nutritious and satisfying without necessarily qualifying as a high-protein food under nutrition labelling rules. And although our recipe uses four egg whites, that protein is distributed throughout the entire batch.
Rather than relying on granola alone to meet your protein needs, think about what you’re serving it with.
How to build a protein-rich granola breakfast
Try combining:
- ¾ cup plain Greek yogurt
- ⅓ to ½ cup homemade granola
- Fresh berries
- A sprinkle of hemp hearts
Depending on the yogurt and serving sizes, this breakfast can provide roughly 20–30 grams of protein.
It’s also a great combination of creamy, crunchy, sweet and tart.
Chef Tip: If increasing protein is your goal, pair your granola with a protein-rich food instead of simply doubling the amount of granola.
5. You Can Make Homemade Granola Gluten-Free
Good news for anyone avoiding gluten: granola is one of the easiest breakfast recipes to adapt. Most of the ingredients we use are naturally gluten-free.
Almonds, pecans, pumpkin seeds, sunflower seeds, hemp hearts, chia seeds, coconut and pure maple syrup don’t naturally contain gluten.
The ingredient you need to pay attention to is oats.
Aren’t oats naturally gluten-free?
Oats themselves don’t naturally contain gluten, but conventional oats can come into contact with wheat, barley or rye during growing, harvesting, transportation and processing. That’s why someone following a strict gluten-free diet should choose oats specifically labelled gluten-free.
For people with celiac disease, it’s also worth knowing that a small percentage react to avenin, a protein naturally found in oats. Anyone with celiac disease should follow their healthcare provider’s guidance about introducing gluten-free oats.
How to make our granola gluten-free
It’s simple:
- Choose certified or appropriately labelled gluten-free rolled oats.
- Check the labels on packaged nuts, seeds and dried fruit.
- Watch for cross-contact when buying from shared bulk bins.
- Use clean utensils, bowls and baking sheets.
One important note about Bulk Barn: while it’s fantastic for shopping, shared scoops and bins may present cross-contact risks. If you’re preparing granola for someone with celiac disease, individually packaged, verified gluten-free ingredients are generally a safer choice.
Chef Tip: Gluten-free oats behave much like regular rolled oats in granola. You shouldn’t need to change the baking time simply because you’ve switched to gluten-free oats.
6. The Type of Oats You Choose Really Matters
Not all oats are created equal, especially when you’re making granola.
Walk down the cereal aisle and you’ll find several varieties.
Here’s how they compare.
Old-fashioned rolled oats
These are our first choice. Rolled oats have been steamed and flattened, giving them a broad, relatively sturdy shape. They absorb the maple syrup and egg white mixture beautifully while maintaining their structure during baking.
The result is granola with a wonderful balance of crunch and chew.
Quick oats
Quick oats are rolled thinner and often cut into smaller pieces. They cook faster and absorb liquid more readily. You can use them in granola, but the finished texture tends to be finer and less chunky.
If you love big clusters, stick with old-fashioned rolled oats.
Steel-cut oats
Steel-cut oats are chopped rather than rolled. They have a much harder texture and don’t behave the same way in a quick-baking granola recipe.
We do not recommend substituting them directly into our recipe.
Instant oatmeal
Those little flavoured packets? Save them for another day.
They’re often finely processed and may contain added sugar, salt and flavourings.
Chef Tip: Rolled oats are the sweet spot. They provide enough structure for crunchy clusters while still becoming tender during baking.
7. Don’t Skip the Salt or the Fat
Here’s something we tell people in our cooking classes all the time. Salt isn’t just for savoury food.
It’s one of the most important ingredients in baking, and homemade granola is no exception.
Why granola needs salt
Granola contains ingredients with naturally sweet, earthy and nutty flavours. Without salt, those flavours can taste a little flat.
A small amount of flaky sea salt enhances the sweetness of the maple syrup and balances the richness of the nuts and seeds. It doesn’t make your granola taste salty. It makes everything taste more like itself. Our recipe uses one teaspoon of flaky sea salt for the entire batch.
Keep in mind that different salts vary considerably in density. A teaspoon of fine table salt contains more salt by weight than a teaspoon of many flaky salts, so don’t substitute them blindly.
What about the olive oil?
Fat plays an important role in granola, too. It helps ingredients brown, improves flavour and contributes to a crisp, satisfying texture. We use a small amount of olive oil. It brings a lovely richness without making the granola greasy.
You can experiment with neutral oils or melted coconut oil, but we like the subtle savoury quality olive oil brings to the finished product. And because the nuts and seeds already contain natural fats, you don’t need to add an enormous amount of oil.
Chef Tip: If your granola tastes a little dull, don’t automatically add more maple syrup. It might just need better seasoning.
8. The Baking and Cooling Process Is Where the Magic Happens
You can buy the best ingredients and measure everything perfectly, but if you don’t bake and cool your granola properly, you won’t get that beautiful crunch.
Why granola gets crispy in the oven
There are two important things happening during baking. First, moisture evaporates. As the oats, nuts and seeds lose moisture, their texture becomes drier and crisper.
Second, the ingredients develop flavour through browning reactions. Nuts and seeds toast, creating deeper, richer flavours. The maple syrup becomes more concentrated, and the egg white proteins help hold everything together.
Don’t overcrowd the baking sheet
Spread the mixture evenly over a parchment-lined baking sheet. You want enough surface area for moisture to escape. If you pile everything into a deep layer, the granola may steam rather than dry evenly.
For a large batch, use two baking sheets if necessary.
Watch the colour, not just the clock
Our original recipe bakes at 350°F (175°C), beginning with 15 minutes before adding the dried cranberries and baking for approximately another five minutes. Every oven is different.
Nuts, coconut and seeds can go from golden to overly toasted surprisingly quickly, particularly around the edges of the pan. Look for a lightly golden colour and a toasted aroma.
The most important part? Let it cool.
Freshly baked granola may still feel a little soft when it comes out of the oven. That’s normal. As it cools, the sugars firm up and the mixture becomes crisp. Resist the urge to start breaking it apart immediately.
Let the granola cool completely on the baking sheet before transferring it to a storage container.
Chef Tip: For larger clusters, press the mixture together before baking and avoid excessive stirring. Let it cool undisturbed, then break it into pieces.
9. Homemade Granola Is One of the Easiest Recipes to Customize
Once you understand the basic formula, homemade granola becomes a wonderful way to experiment with different flavours and ingredients. Think of our recipe as a starting point. You need a balance of grains, nuts, seeds, sweetener and enough binding ingredients to bring everything together.
After that, there’s plenty of room to play.
Try these homemade granola combinations
Maple Pecan Granola
Use plenty of pecans, a little cinnamon and pure maple syrup. A fantastic combination with sliced bananas and yogurt.
Coconut Almond Granola
Increase the coconut strips and almonds. Add a little vanilla or almond extract for extra flavour.
Pumpkin Seed and Cranberry Granola
A colourful combination with plenty of crunch and a tart finish. This is particularly good in the fall.
Chocolate Granola
Add cocoa powder to the dry mixture, or stir chocolate chips into the granola once it’s completely cool.
Warm Spiced Granola
Try cinnamon, ginger, cardamom or a pinch of nutmeg. These spices pair beautifully with maple syrup and toasted nuts.
What about dried fruit?
Dried cranberries, raisins, chopped apricots and dried cherries all work beautifully.
But timing matters.
Dried fruit contains concentrated sugars that can scorch or become tough if exposed to too much heat. In our recipe, we add cranberries toward the end of baking. You can also stir dried fruit into the granola after baking, once it’s cooling or completely cool. Both approaches work, depending on the texture you prefer.
Can you make homemade granola nut-free?
Yes, with a few adjustments. Replace the almonds and pecans with additional pumpkin seeds, sunflower seeds or other suitable ingredients.
Keep the overall balance of dry ingredients similar so the egg whites and maple syrup can coat everything evenly. For someone with a nut allergy, check all ingredient labels and potential cross-contact carefully, particularly with bulk products.
Chef Tip: When experimenting, change one or two ingredients at a time. That way, you’ll know which combinations work best.
10. Homemade Granola Is More Than Just Breakfast
Of course, granola and yogurt are a classic combination. But there are plenty of other ways to enjoy a batch.
And once you’ve made a big tray, you’ll probably find yourself reaching for it throughout the day.
Our favourite ways to serve homemade granola
With Greek yogurt and fresh fruit
One of the easiest breakfasts around. Add berries, peaches, apples or whatever is in season.
On smoothie bowls
A handful of granola adds some much-needed crunch to a creamy smoothie bowl.
With milk
Sometimes simple is best. Treat it like your favourite breakfast cereal.
On baked apples or pears
Warm fruit with crunchy granola is a lovely combination. Add a spoonful of yogurt for a quick dessert.
Over chia pudding
Prepare chia pudding the night before, then add granola just before serving.
As a snack
A small handful is an easy option when you need something satisfying between meals.
On a brunch buffet
Serve granola in a big bowl alongside yogurt, fresh fruit and a few other breakfast favourites.
Guests can build their own bowls, and you’ve got one less thing to prepare in the morning.
How to store homemade granola
Storage is almost as important as baking. The enemy of crunchy granola is moisture.
Once your granola has cooled completely, transfer it to an airtight container. A glass jar, Jody’s favourite sealed storage containers or resealable food-safe bag works well.
Keep it in a cool, dry place away from direct sunlight. Because homemade granola contains nuts and seeds with natural oils, it can eventually develop stale or rancid flavours.
For the best quality, we recommend enjoying it within about two weeks at room temperature, provided it’s thoroughly baked and stored properly. Shelf life will vary with ingredients, moisture and storage conditions.
Can you freeze granola?
Absolutely. Freezing is a great option if you’ve made a large batch.
Divide it into airtight freezer-safe containers or bags and freeze for up to about three months for best quality. Allow it to come to room temperature while still sealed to help prevent condensation from softening the granola. If your granola loses a little crunch during storage, you can refresh it briefly in a low oven, then let it cool completely.
Chef Tip: Never put warm granola into a sealed container. Trapped steam creates condensation, and condensation is the enemy of crunch.
Is Homemade Granola Actually Healthier Than Store-Bought?
It’s a fair question. After all, granola has a reputation for being a healthy breakfast, but some commercial varieties contain substantial amounts of added sugar and oil. Making your own gives you control over those ingredients. You decide how much maple syrup to use, which nuts and seeds to include, and whether to add sweetened dried fruit or chocolate. You can also choose ingredients that contribute fibre, protein and unsaturated fats.
But homemade doesn’t automatically mean lower in calories or sugar.
Nuts, seeds and oils are nutritious, but they’re also energy-dense. And maple syrup is still an added sugar.
The benefit is being able to make a granola that suits your tastes and nutritional goals.
What makes a balanced granola?
We like to focus on a few things:
- Whole-grain rolled oats for fibre and texture.
- Nuts and seeds for protein, minerals and healthy fats.
- A moderate amount of sweetener.
- Enough fat for flavour and texture without making the granola greasy.
- A serving size that makes sense for the meal.
And remember, granola doesn’t have to do all the nutritional heavy lifting.
Serve it with Greek yogurt, milk, fruit or another protein-rich food to build a more complete breakfast.
Frequently Asked Questions About Homemade Granola
Why isn’t my homemade granola crunchy?
The most common reasons are too much moisture, overcrowding the baking sheet, insufficient baking or storing the granola before it has cooled completely.
Granola also continues to crisp as it cools, so don’t judge the texture while it’s still warm.
How do I make homemade granola clusters?
A combination of maple syrup and whipped egg whites helps bind the ingredients together. Press the mixture gently onto the baking sheet, avoid excessive stirring and let it cool completely before breaking it apart.
Is maple syrup better than honey for granola?
We prefer maple syrup for its flavour and crisp finish. Honey can create excellent granola too, but its sugar composition can produce a slightly stickier texture in some recipes. Both are added sugars, so use whichever you enjoy in a sensible amount.
Can I make homemade granola without egg whites?
Yes. Many granola recipes rely on sweeteners and oils to bind the ingredients. However, omitting the egg whites from our recipe will change the texture and may reduce the formation of large clusters. A purpose-designed egg-free recipe will give you more predictable results.
Is homemade granola high in protein?
It can contribute protein, particularly when made with hemp hearts, pumpkin seeds, almonds, chia seeds and other nuts and seeds. The exact amount depends on the ingredients and portion size. Pairing granola with Greek yogurt is an easy way to create a higher-protein breakfast.
Can I use quick oats instead of rolled oats?
Yes, but expect a finer texture and smaller clusters. Old-fashioned rolled oats provide a sturdier, more satisfying crunch.
Can homemade granola be gluten-free?
Yes. Choose gluten-free labelled oats and check the remaining ingredients for potential gluten cross-contact. People with celiac disease should also follow medical advice about oat tolerance.
Why did my granola burn?
Granola contains nuts, seeds and sugars that can brown quickly. Oven temperature, pan material, baking sheet position and uneven spreading can all affect the result. Watch for a golden colour and toasted aroma rather than relying entirely on the timer.
Should I add dried fruit before or after baking?
Either can work, but adding dried fruit toward the end of baking or after baking helps prevent scorching and excessive drying. Our recipe adds dried cranberries during the final five minutes.
How long does homemade granola last?
For best quality, aim to enjoy it within about two weeks when stored completely cool in an airtight container in a dry location. You can also freeze it for longer storage. Discard granola if it develops off odours, visible mould or other signs of spoilage.
Make Our Favourite Crunchy Homemade Granola
After years of cooking professionally, we’re still convinced that some of the best recipes are the simplest ones.
Homemade granola is a perfect example.
A few pantry ingredients, a little understanding of how they work together, and you’ve got something delicious that you can enjoy all week.
Our recipe combines rolled oats, almonds, pecans, hemp hearts, seeds, coconut, dried cranberries, pure maple syrup and our secret ingredient, whipped egg whites.
It’s crunchy, lightly sweet, packed with texture and easy to make your own.
And once you’ve made a batch, you might find that the store-bought stuff just doesn’t cut it anymore.
Ready to get cooking? Head over to our Super Crunchy Homemade Granola Recipe for the complete ingredient list, measurements and step-by-step instructions.
And if you’re planning a weekend breakfast or brunch, pair it with a few more favourites from our recipe collection.
Happy cooking!
Jody & Kirstie
Jody O’Malley and Kirstie Herbstreit are Red Seal certified chefs and co-owners of The Culinary Studio in Waterloo, Ontario. Jody graduated from Stratford Chefs School in 2002, and Kirstie from SAIT in Calgary in 2003. With over 20 years of professional cooking experience and 15 years running their culinary education business, they’re passionate about teaching home cooks the science, skills and techniques behind great food. Together, they host live online cooking classes, corporate culinary experiences and co-host the Chef Over Your Shoulder podcast with Amy Schlueter.


